Configure Jira Data Center to use Jira in Freehand
- 16 Mar 2023
- 1 Minute to read
- DarkLight
Configure Jira Data Center to use Jira in Freehand
- Updated on 16 Mar 2023
- 1 Minute to read
- DarkLight
Article Summary
Share feedback
Thanks for sharing your feedback!
The Jira tool in Freehand allows you to combine Freehand’s flexible canvas with Jira’s structured project tracking tool. If you’re using Jira Data Center, an Admin or Owner on your InVision account needs to configure Jira to use it in Freehand.
This article includes the steps your organization’s Admin or Owner needs to take:
InVision supports using Jira in Freehand with Jira Data Center versions 7.2.0 to 9.x.x.
Configure Jira Data Center in InVision
To configure Jira Data Center in InVision:
- Sign in to your InVision V7 account.
- On the left sidebar, select Apps.
- Scroll down to locate Jira Data Center and select Configure.
- In the new page that opens, click +Add Jira Site.
- Add your Data Center URL.
- Continue to the next procedure, Link Jira and InVision.
Link Jira and InVision
Note: To manage these tasks in Jira, you must have Jira Admin privileges.
To establish a connection between InVision and Jira, create an application link which will enable access from InVision to Jira.
Within InVision, the Add a site modal contains instructions for linking Jira and InVision, including the values you need. If you require additional information about creating application links with Jira, read Jira's documentation Link to other applications.
- In a new browser tab, open Jira.
- In Jira, complete the setup instructions provided in the InVision Add a site modal.
- In InVision, select Test connection.
- If the test is successful, select Save. A modal to configure a webhook opens.
- Continue to the next procedure, Create a webhook in Jira.
Create a webhook in Jira
Once you’ve connected InVision and Jira and configured Jira Data Center in InVision, create a webhook in Jira to receive updates on the Jira issues in Freehand.
To create a webhook automatically:
- In the Webhook modal, select Create webhook.
- Select Allow.
Note: To create the webhook automatically, you must be signed in as a Jira Admin.
To create a webhook manually:
- In InVision, in the Webhook modal, copy the URL.
- In your Jira account, go to the System tab.
- Below the Advanced heading, select Webhooks.
- At the upper right corner, select + Create a Webhook.
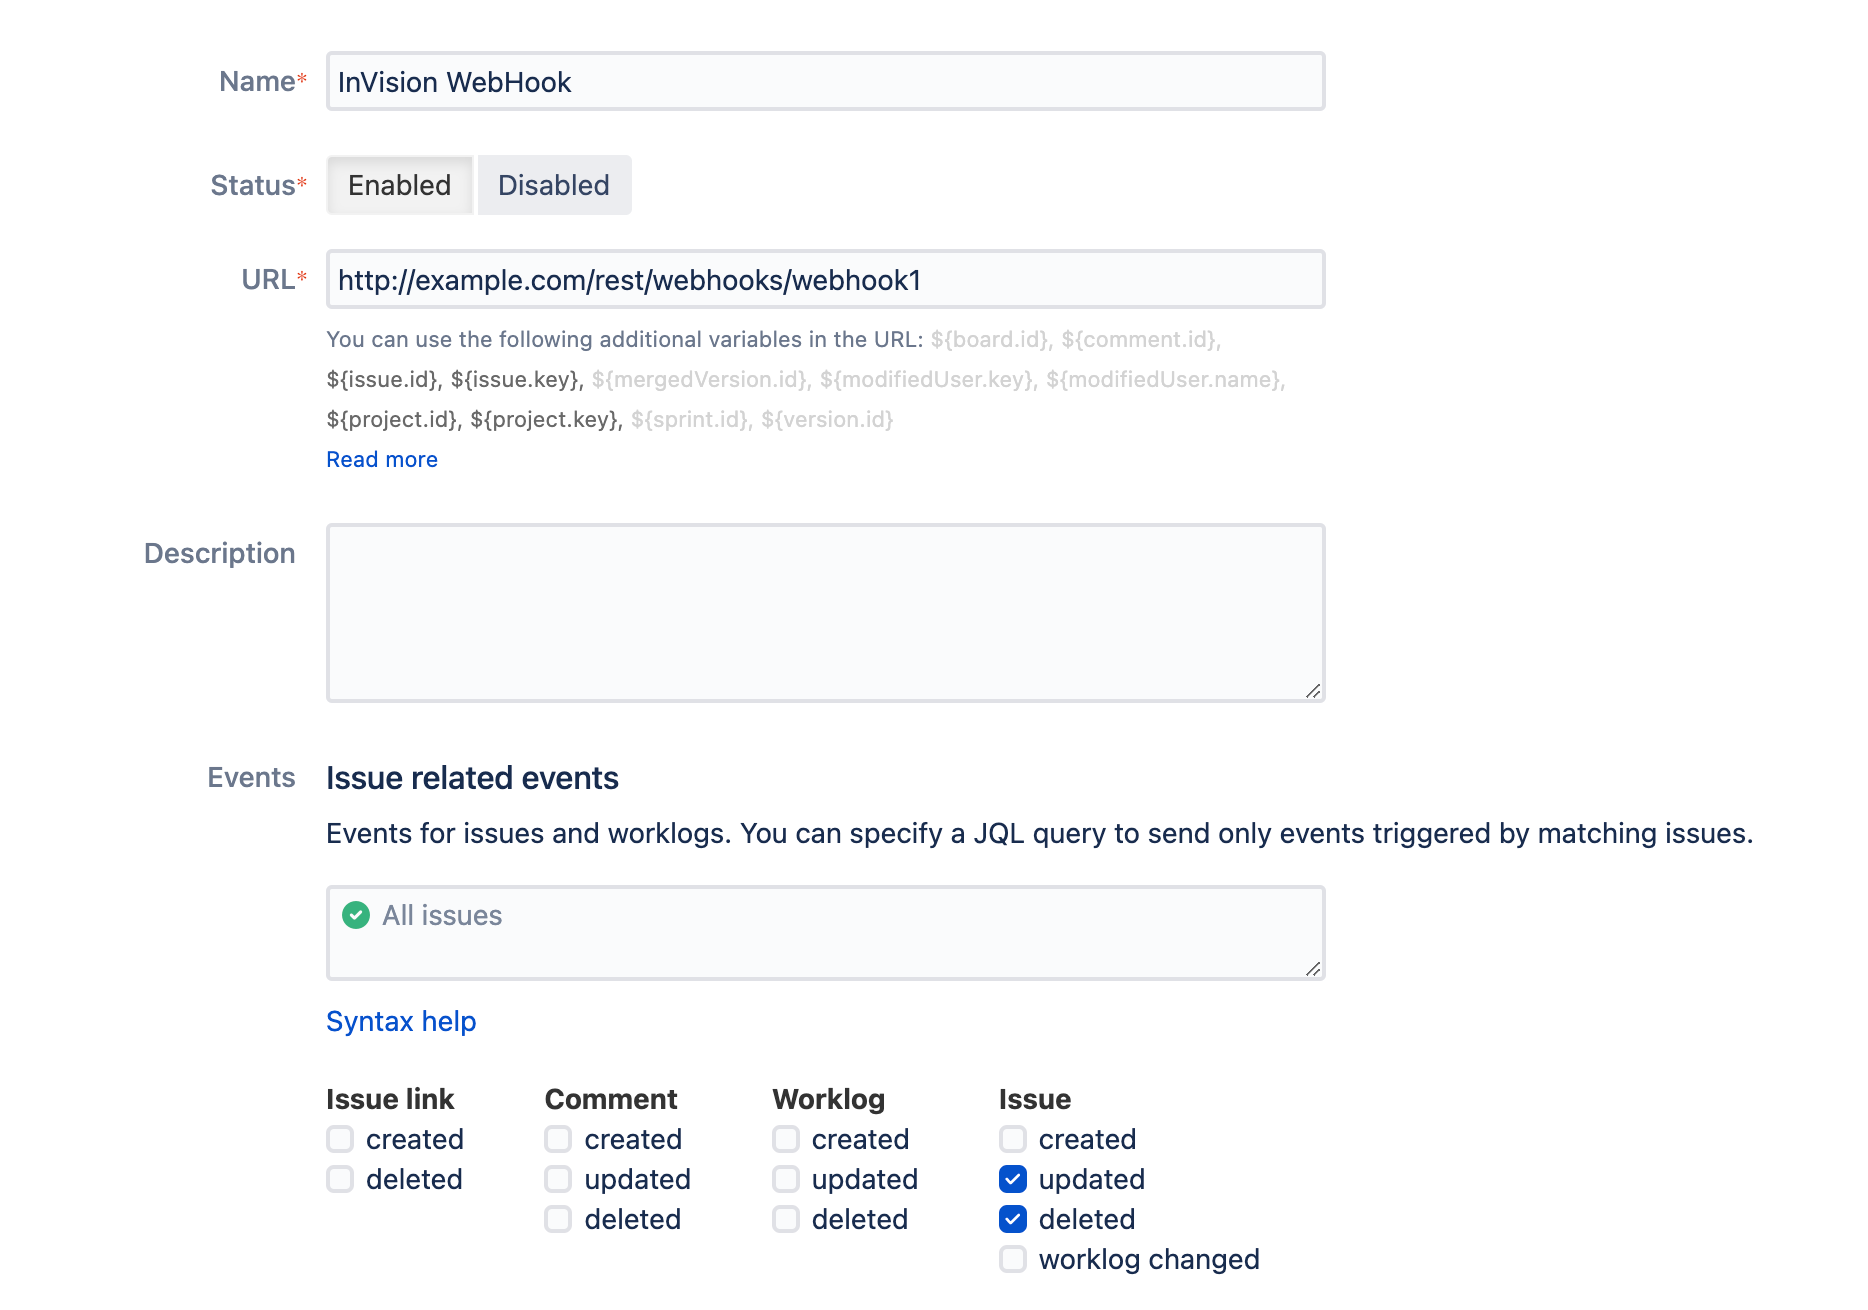
- In the URL field, paste the webhook URL you copied from InVision.
- Under the Issue heading, select the updated and deleted checkboxes.
- Select Create.

Was this article helpful?