Managing share links
- 30 Jan 2023
- 2 Minutes to read
- DarkLight
Managing share links
- Updated on 30 Jan 2023
- 2 Minutes to read
- DarkLight
Article Summary
Share feedback
Thanks for sharing your feedback!
This article provides answers for InVision V6To confirm your version, check the upper right corner of your dashboard. On V7? Read this article instead. | 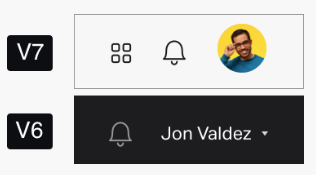 |
Creating public share links
To create a public link, open your prototype and select Share. At the bottom of the pop-up modal, select public share link. A link is copied to your clipboard and you can then share with others.
To adjust the share link settings, select Link Settings at the bottom of the sharing modal. Learn more about link settings.
Viewing all share links
To view and manage existing share links:
- Sign in to InVision and navigate to the Documents page.
- Open your prototype and select More (•••).
- Select Manage share links.
You can also access the Share links page by selecting the Shares tab in your prototype or selecting Share > Manage Links (at the bottom of the sharing modal).


For each share link, you can see the settings, check the number of views, and copy the link. The following table details what each column in the Existing Shares dialog represents.
Feature | Icon | Description |
|---|---|---|
Comments |
| The share link is set to allow comments. |
Hotspots |
| Hotspots are enabled for the share link. |
| Browse |
| Recipients can use the link to access all screens in the prototype. |
Password |
| Recipients must enter the share link password to access the prototype or screens. |
Hinting |
| Hotspot hinting is enabled for the share link. |
Identity |
| Recipients must enter a name and email address to access the prototype or screens. |
| Inspect |
| Recipients can see a link to inspect the prototype or screens. |
| Views | N/A | This column displays the number of times the share link has been viewed. |
Updating share links
You can edit the settings and the screen selection of an existing share link and add a title without changing the link.
To edit the settings of an existing share link:
- Open your prototype and select More (•••).
- Select Manage share links.
- Next to the share link you want to update, select More (•••), then select Edit settings.
- Update the settings and the screen selection, then select Update share at the lower-right corner of the page.
From that page you can also add a title to a share link to help locate it. Next to the share link you want to update, select More (•••) > Add title. Add a title for the share link and select Update share at the lower-right corner of the page.
Revoking share links
If you no longer want viewers to access a share link, you can permanently revoke it.
To revoke a share link:
- Open your prototype and select More (•••).
- Select Manage share links.
- Next to a share link, select More (•••), then select Revoke.Note: If you want to revoke all existing links for the prototype, navigate to the bottom of the page and select Revoke all share links. To confirm, select OK.
Was this article helpful?