- 30 Jan 2023
- 1 Minute to read
- DarkLight
SCIM: Generating new authentication tokens for user provisioning in InVision V6
- Updated on 30 Jan 2023
- 1 Minute to read
- DarkLight
The authentication token InVision provides for SCIM is displayed only once—when an Enterprise owner or admin initially enables SCIM provisioning. If an owner or admin opens the SCIM settings in InVision again later, the token will be hidden to further protect the security of your account.
An owner or admin can easily generate a new authentication token; however, generating a new token will cause the previous token to expire.
Generating a new authentication token
To generate a new SCIM authentication token:
- Sign in to your InVision V6 Enterprise here:
your-team-name.invisionapp.com - At the top of the page, click People.
- To the right of the Teams tab, click the ••• (more) icon and click SCIM Provisioning.
- Below the Authentication token field, click the I want to generate a new token checkbox.
- Click Generate token.
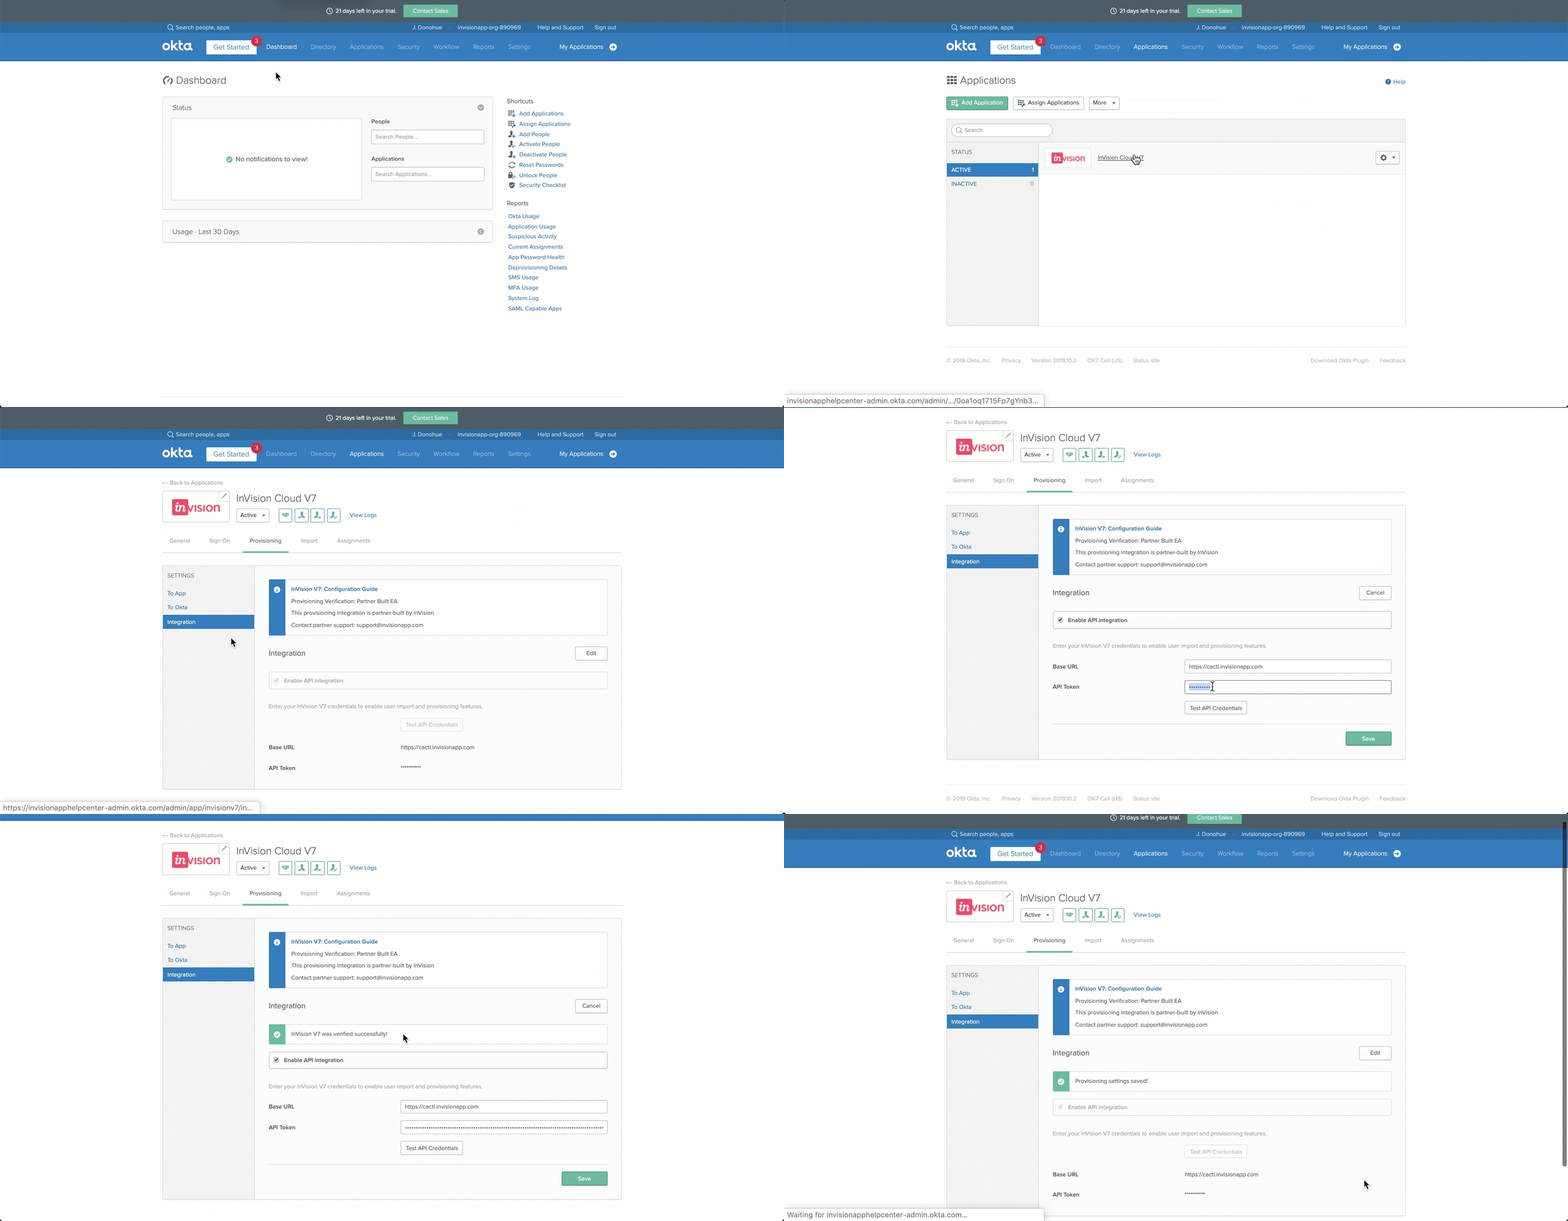
Since the authorization token is only displayed while completing the steps above, remember to copy the token and immediately update the API Token field in your Okta Admin settings.
Updating the API Token in Okta
To update the API token in Okta:
- Sign in to Okta, click the Admin button, click Applications in the main navigation, and click the InVision link.
- Click the Provisioning tab, and then click the Integration sub-tab in the left panel.
- To the right of the Integration heading, click Edit.
- In the API Token field, paste the authentication token you copied from InVision.
- Click Test API Credentials.If the test is successful, you will see a verification message just above the Enable API integration checkbox.
- Click Save.

Learning more about SCIM provisioning for InVision V6
To learn more about SCIM provisioning for InVision V6, see these related articles:

