Spaces in InVision V7
- 08 May 2023
- 4 Minutes to read
- DarkLight
Spaces in InVision V7
- Updated on 08 May 2023
- 4 Minutes to read
- DarkLight
Article Summary
Share feedback
Thanks for sharing your feedback!
This article provides answers for InVision V7 To confirm your version, check the upper right corner of your dashboard. | 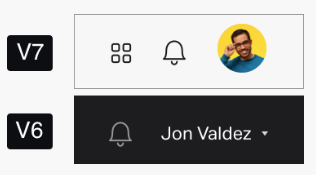 |
Spaces add a layer of organization within groups, providing simple, yet powerful organization for your documents.
For instance, if you use groups to distinguish between different product areas (for example, iOS, web), spaces allow you to further organize the documents into components or flows (for example, onboarding, payments). Or if you‘re an agency that uses groups to categorize documents by client, you can use spaces to compartmentalize each client’s documents into specific contracts or projects. Spaces were designed to give teams more flexibility to organize their work.
Create a space
To create a new space:
- Sign in to your InVision V7 account.
- On the left sidebar, hover over a group name and select the + button.
- Enter a name for your space.
- Optionally, pick the color and the shape displayed in the space thumbnail.
- Select the group where you want to create the new space or create a new group.
- Select Create to confirm. The newly created space page opens.
Space overview
Write a thorough description of your project in the space overview. Provide your team and stakeholders with the goals, status, and any other relevant resources related to the project.
Hover over the text area and select add (+) or enter a slash (/) to add content to your page. You can add text with different formatting options, lines, code blocks, and quotes. Highlight the text to reveal an editor that allows you to add text formatting, headings, links, and more. The editor also supports Markdown.
Access spaces
The groups and spaces hierarchy is accessible within each individual group page, the spaces page, and the navigation sidebar.
Individual group
When you open a specific group where at least one space has been created, you will see the space tiles for all spaces that have been created under that group.
If you open a group without spaces, you will see a list of all documents within that group.
Spaces page
If you open the Spaces page in the left sidebar, you will see all available groups within your team, along with any spaces within them. Use the search bar at the top of the page to search for spaces.
Sidebar
All groups you’re a member of appear in the left sidebar. Spaces appear nested below their respective group.
When you open a space, all documents within that space are listed in the sidebar. From the sidebar, you can access all the space documents, create new documents, and customize your space.
- From the space overview or from your current document, open and collaborate on any of the space documents by selecting the documents in the sidebar.
- Select the + button in the sidebar to create new documents in the space or to add external files.
- At the bottom of the sidebar select••• More > Customize space to edit the space name, color, and shape displayed in the space thumbnail.
- Select Hide sidebar (
 ) to minimize the sidebar and focus on your document.
 ) to minimize the sidebar and focus on your document.
Add sections to spaces
You can use sections to add another layer of organization to your space and tell a story about your documents. Sections appear nested below their respective space.
Create new sections
To create a new section:
- Open a space.
- Hover over the name of an existing section on the left sidebar.
- Select ••• More > Create a new section.
- In the Create new section modal, enter the name of the new section and select Continue.
All new documents and any documents not in a section will be grouped in the Unpinned documents section.
Move documents to sections
To move an unpinned document to a section:
- Open a space.
- Locate the document you wish to move in the left sidebar.
- Hover over the document name and select ••• More.
- Select Pin to section.
- Select the desired section or create a new one by selecting Create a new section.
If the space doesn't have sections, you'll see the option Pin to new section, which allows you to create a new section.
To move a document to a different section:
- Open a space.
- Locate the document you wish to move in the left sidebar.
- Hover over the document name and select ••• More.
- Select Update section.
- Select the desired section, create a new one by selecting Create a new section, or unpin the document from the current section by selecting Unpin from section.
Alternatively, you can move a document to a different section by locating the document you wish to move in the left sidebar and dragging it into the desired section.
Reorder sections
By default, sections will appear in the sidebar in the order they are created. You can reorder the sections to tell the story of your space by dragging and dropping the sections in a new position in the sidebar.
Move documents to a space
To move documents to a space:
- Locate the document you wish to move.
- Select••• More > Move.
- In the Move document modal, scroll through or use the search bar to find the space.
- Select Move.
Alternatively, you can also move a document to a space by locating the document you wish to move and dragging the file into the desired space on the left sidebar.
Following the same steps listed above, you can move the document to a different space at any time, or you can remove it from the current space by selecting Unfile from current space from the list of spaces.
Delete a space
To delete a space:
- Open the group where the space was created.
- Hover over the space you want to delete and select••• More.
- Select Delete Space.
- Select Yes, Delete to confirm the deletion of the space.
Was this article helpful?