- 08 May 2023
- 4 Minutes to read
- DarkLight
Plan projects in Freehand with the Azure DevOps integration
- Updated on 08 May 2023
- 4 Minutes to read
- DarkLight
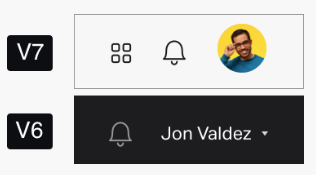
This article provides answers for InVision V7 To confirm your version, check the upper right corner of your dashboard. |  |
Projects are complex, cross-functional efforts. Product managers need to keep everyone aligned, get the best information, and make the best decisions. Freehand brings together all the information and context teams need in one place.
The Azure DevOps integration in Freehand makes project planning more inclusive and engaging. Use the integration during brainstorming sessions, story mapping, task prioritization exercises, sprint planning, retros, and more.
You can import Azure work items to Freehand and create Azure work items directly from cards and sticky notes. And once you configure automatic updates for Azure DevOps, any changes made to the Azure work items update in Freehand in real time.
Import Azure work items to Freehand
To import a work item from Azure DevOps into Freehand:
- Sign in to InVision and open your freehand.
- On the bottom toolbar, select
 {{variable.toolbarMore}} > Azure DevOps.
 - Select Authorize. In the modal, sign in to your Microsoft account.
If you’re an admin in your InVision Enterprise account, you can configure automatic updates for Azure DevOps; if you’re not an admin in your account, ask your organization’s admin to configure automatic updates.
- In the modal, choose an Azure DevOps organization and a project and select Continue.
You can switch to a different organization and project later.
- Select the work items you want to add to your freehand and select Import items from Azure DevOps. You can use the Search field at the top of the modal to search for items in your project.
- Select on the work item ID at the top-left corner of the Azure card to open it in Azure DevOps.
 Color picker.
Create Azure DevOps work items from Freehand
When sprint planning or handing off projects to another team, it's important to connect the work to your existing epics, and track the project in Azure DevOps. With the Azure DevOps integration, create work items from Freehand so everyone sees what they need, where they need to see it.
- In the toolbar, select
 Azure DevOps. The Azure DevOps integration opens.
 - Select Create Azure DevOps item and complete the fields.
The new work item appears on the canvas. To open the work item in Azure DevOps, select the issue ID or Azure DevOps logo on the card.
Convert sticky notes and cards into Azure work items
After a brainstorming or feedback session, your freehand is probably full of sticky notes and cards. Get these items into Azure DevOps by converting them to work items.
- Select a sticky note or a cardin your freehand to open the contextual menu. You can also select several sticky notes or cards to create different Azure work items.
The sticky note(s) and card(s) need to have text, which becomes the Azure work item summary.
- In the contextual menu, select the
 sticky note or
  card and then select
  Convert to Azure DevOps. The Azure DevOps modal appears.
 - In the modal, select an Azure DevOps organization, project, and work item type, and select Continue.
- Complete the fields and select Create Work Item. A new work item appears in your Azure project. The sticky note or card is now an Azure card that includes the Azure work item ID, project name, summary, type, priority, and status.
- Select on the work item ID at the top-left corner of the Azure card to open it in Azure DevOps.
Use Azure DevOps cards with other smart objects
Once you've addedAzure DevOps cards to your freehand, you can use them with other smart objects to make the most of Freehand's intelligent canvas.
Drag people stickers ontoAzure DevOps cards to assign them. The assignee value is synced back toAzure DevOps, so you can do all your planning right in your Freehand canvas.
Try template!
Switch to a different Azure DevOps project
Every time you open the integration, it defaults to the project you last chose. You can switch the project at any time.
- In the Azure DevOps integration modal, select Change next to the current project name.
- Select a new organization or project and select Continue.
Configure automatic updates for Azure DevOps in Freehand
Changes you make in Azure DevOps reflect in Freehand after an admin or owner sets up automatic updates for Azure DevOps. To configure Azure DevOps to get automatic updates in Freehand, read Configuring automatic updates for Azure DevOps in Freehand.
Error: Access to project was denied
After opening the Azure integration and selecting your organization, you may receive the following error when trying to select your project: Access to Project was denied. Try authorize.
This happens if your Azure organization doesn’t let third-party applications access via OAuth.
To fix this error, let third-party applications access your Azure organization account via OAuth. For information about turning on OAuth, read Microsoft's documentation.

 {{variable.toolbarMore}} > Azure DevOps.
 Azure DevOps. The Azure DevOps integration opens.
 sticky note or
  card and then select