Linked Documents
- 25 Jan 2023
- 2 Minutes to read
- DarkLight
Linked Documents
- Updated on 25 Jan 2023
- 2 Minutes to read
- DarkLight
Article Summary
Share feedback
Thanks for sharing your feedback!
This article provides answers for InVision V7 To confirm your version, check the upper right corner of your dashboard. | 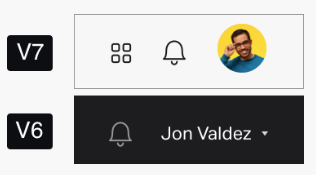 |
You'll see the linked documents sidebar when working on the screens overview page. This sidebar makes it easier to create and update linked documents. From there, you can also access and update other documents that belong to the same group.
Create a new linked document
To create a new linked document without leaving your prototype:
- Select the screens you want to include in the linked document.
Note: If you don't select any screens, all prototype screens will be sent to the linked document by default. - Drag the selected screens to the Linked documents sidebar on the right side, and drop them on the Create Freehand callout.
- In the Add screens modal, either create a new document to add the screens to, or choose an existing document. To create a new document, enter a name for the document and click Create.To add to an existing document, click Select existing and choose the document.
Note: If the current document belongs to a group, the linked document will automatically be added to the same group. If the current document doesn't belong to a group, the linked document will be created outside of a group. To add or move a document to a group, check out Adding or moving InVision V7 documents to a group.
Once you create a new linked document, you'll see it in the Linked documents sidebar for quick access.
You can create as many linked documents as needed for any given prototype.
Tip: Save a little time when selecting screens! To grab multiple screens at once and retain their order, click and drag over the screens. Alternatively, select the first one, hold the
Shift key, and select the last screen in the series. To grab all screens at once, select the first one, and click Select all in the contextual bulk actions bar at the bottom.Update linked documents
To update the screens in a linked document:
- Select the screens you want to update in the linked document.
- Drag the selected screens to the Linked documents sidebar and drop them on the thumbnail of the document you want to update.

Use the bulk actions bar
As an alternative to dragging and dropping screens to the Linked Documents sidebar, you can also take advantage of the Send to button in the contextual bulk actions bar that appears when one or more screens are selected.
Here is how you send screens using the bulk actions bar:
- Select the screens you want to update in the linked document. The bulk actions bar appears at the bottom.
- Click Send to.
- In the Add modal, choose either Freehand or Prototype.
- Choose to either Create a new document or Select existing.
Was this article helpful?