- 07 Feb 2023
- 2 Minutes to read
- DarkLight
Spaces for InVision V6
- Updated on 07 Feb 2023
- 2 Minutes to read
- DarkLight
This article provides answers for InVision V6 EnterpriseTo confirm your version, check the upper right corner of your dashboard. On V7? Check out this article instead. | 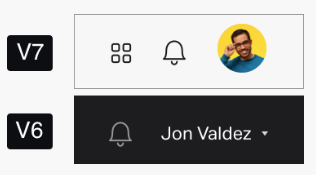 |
To access your organization’s spaces, sign in to InVision and navigate to the Spaces page. Spaces will be organized into 2 tabs:
- My spaces: Spaces you’ve been invited to or have created.
- All spaces:Spaces that have been created within the Enterprise organizationNote: This tab might be empty for some users, depending on what permissions are set.

Creating a space
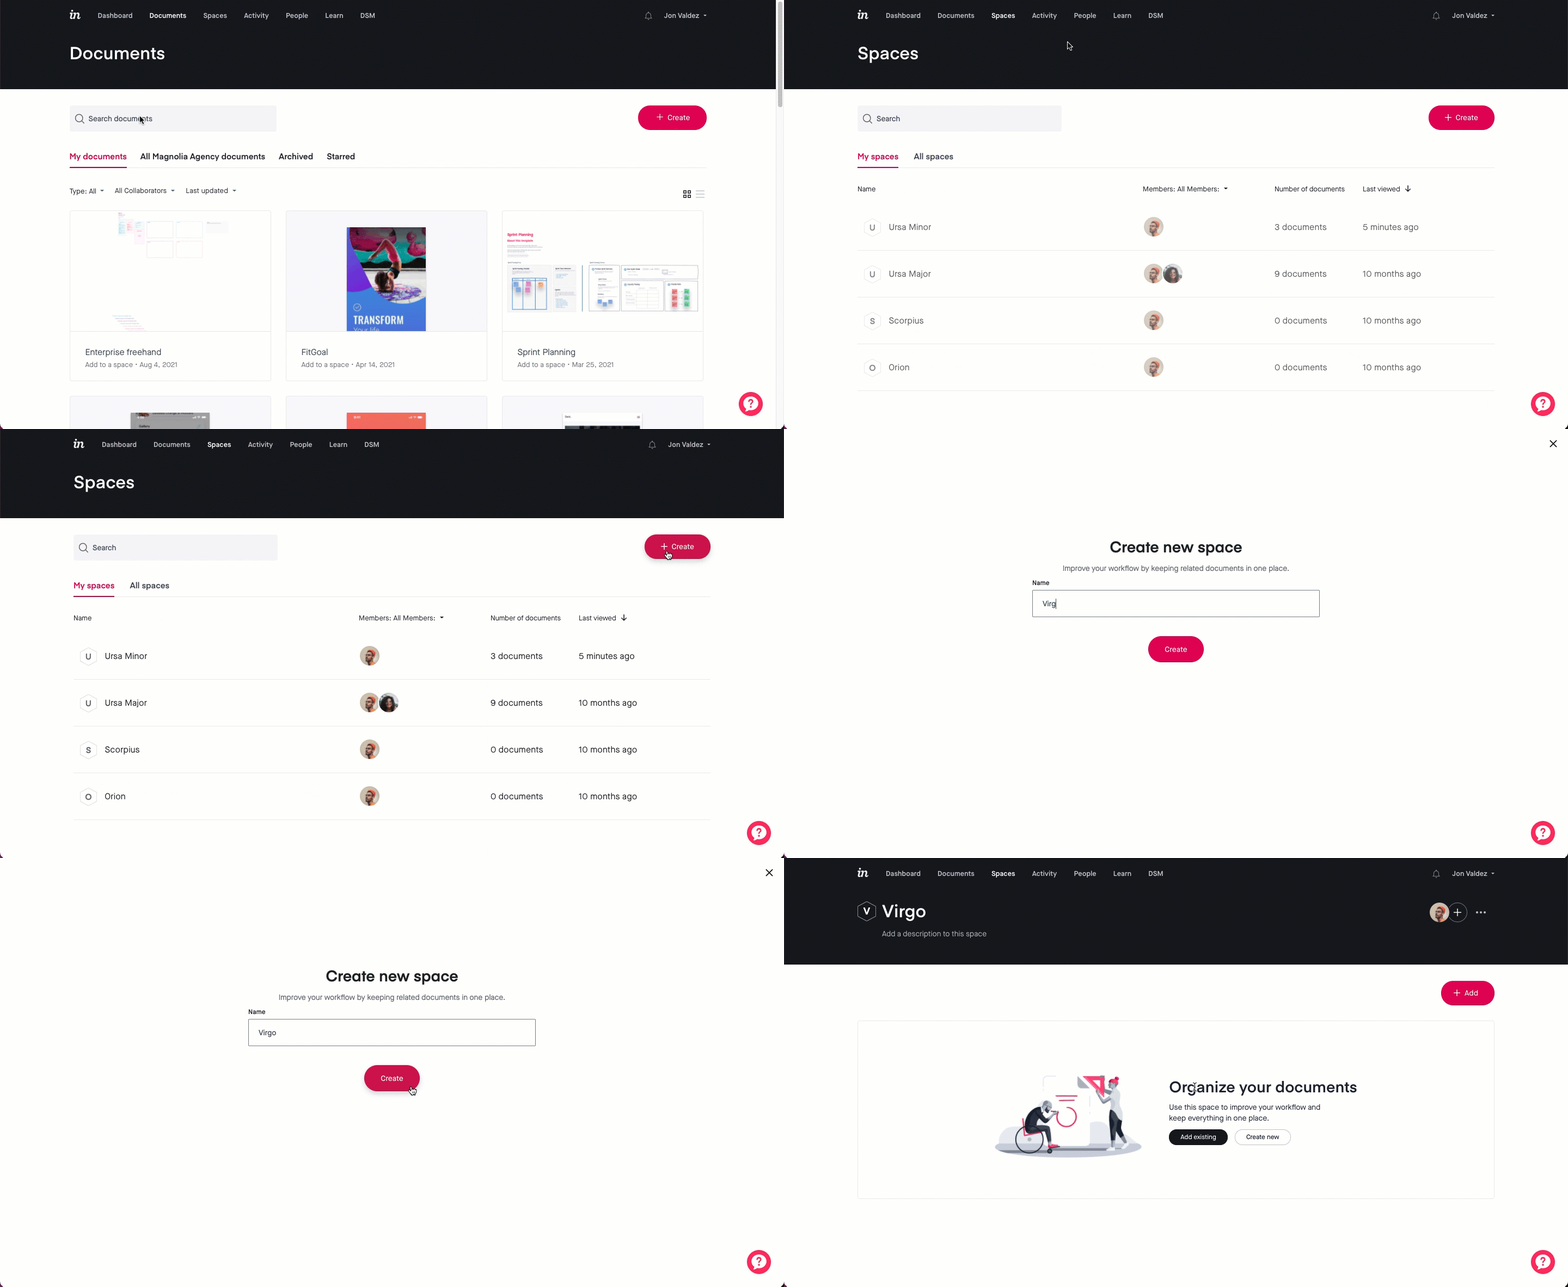
To create a new space:
- Sign in to InVision and navigate to the Spaces page.
- Click the + Create button.
- Enter a name and click Create.
Adding and removing documents
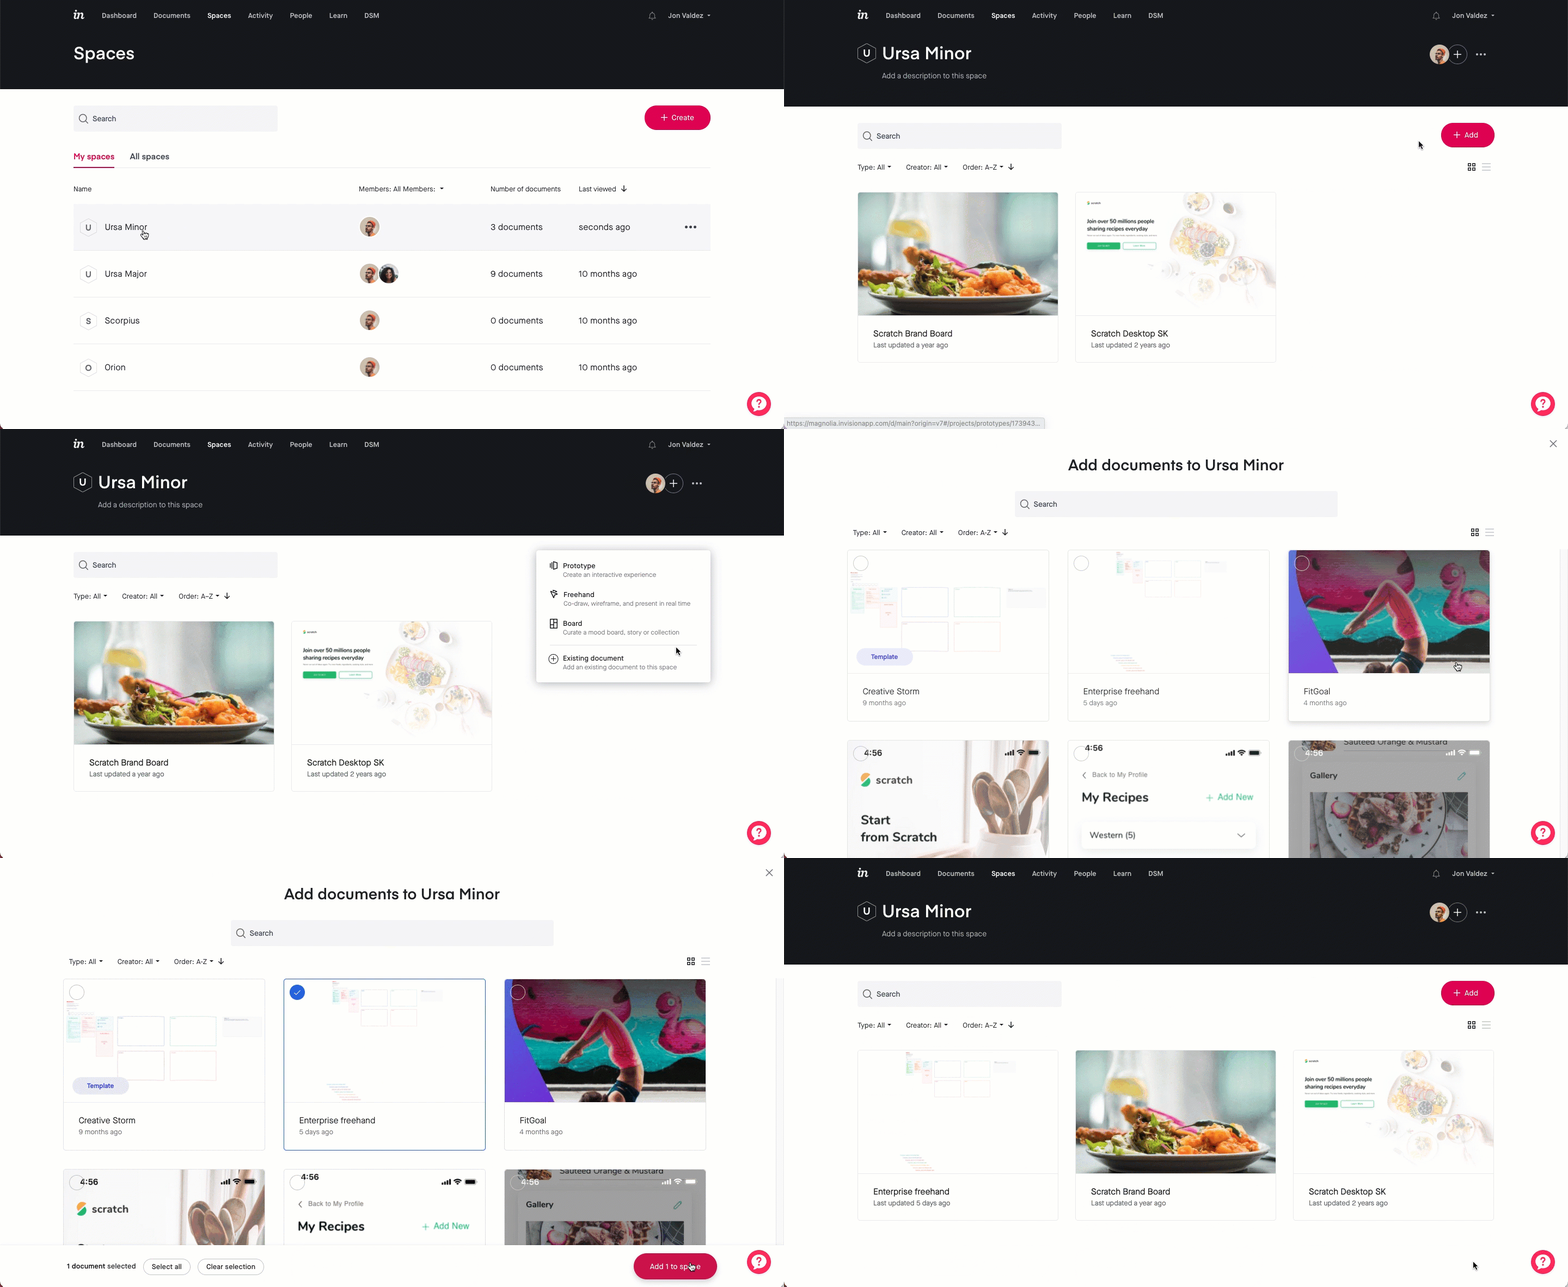
To add documents to a space:
- Open a space, and then click the + Add button.
- Select Existing Document.Note: You can also create a new document by selecting Prototype, Freehand, or Board.
- Select the documents you want to add, and then click the Add to space button.
To remove documents from a space:
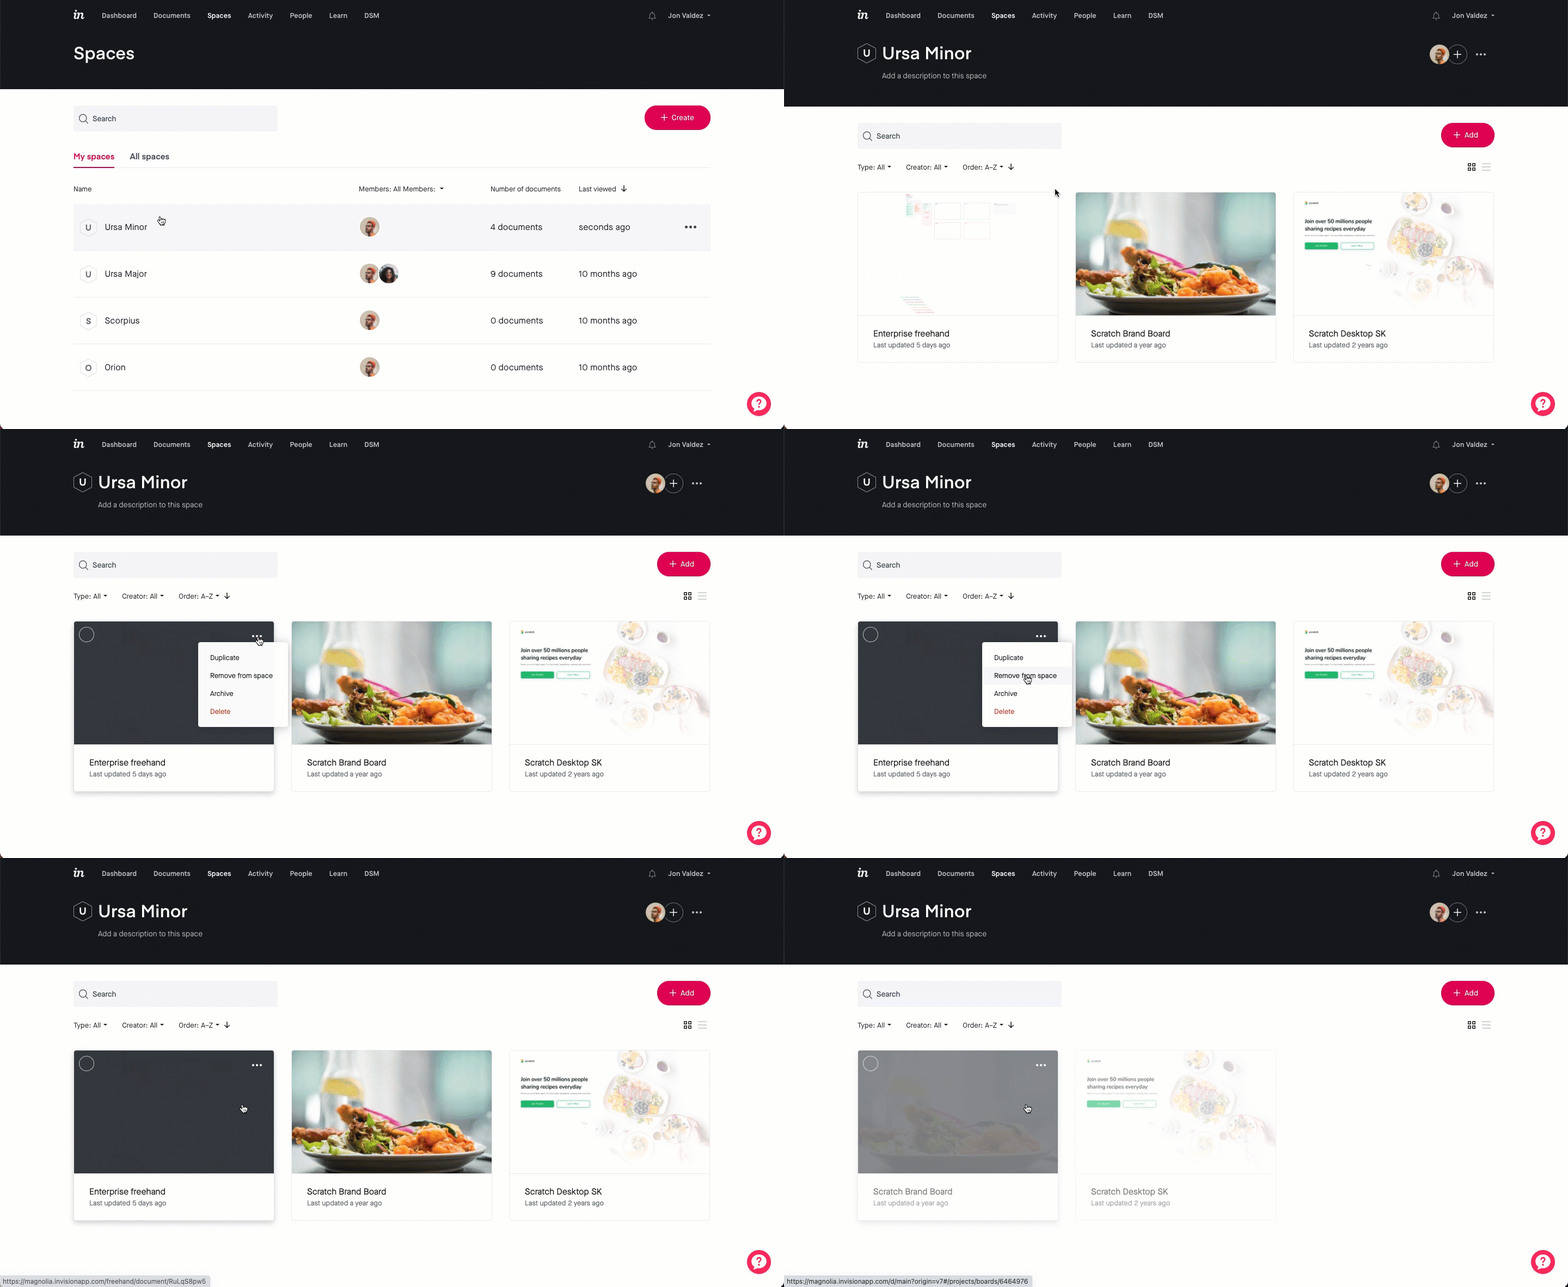
- Open a space.
- Hover over a document and click the ••• (more) icon.
- Click Remove from space.
Adding and removing people
To add someone to a space:
- Open a space and click the Add / Remove People icon (
 ).
). - Search for and select the users you want to add.
- Click Save changes.
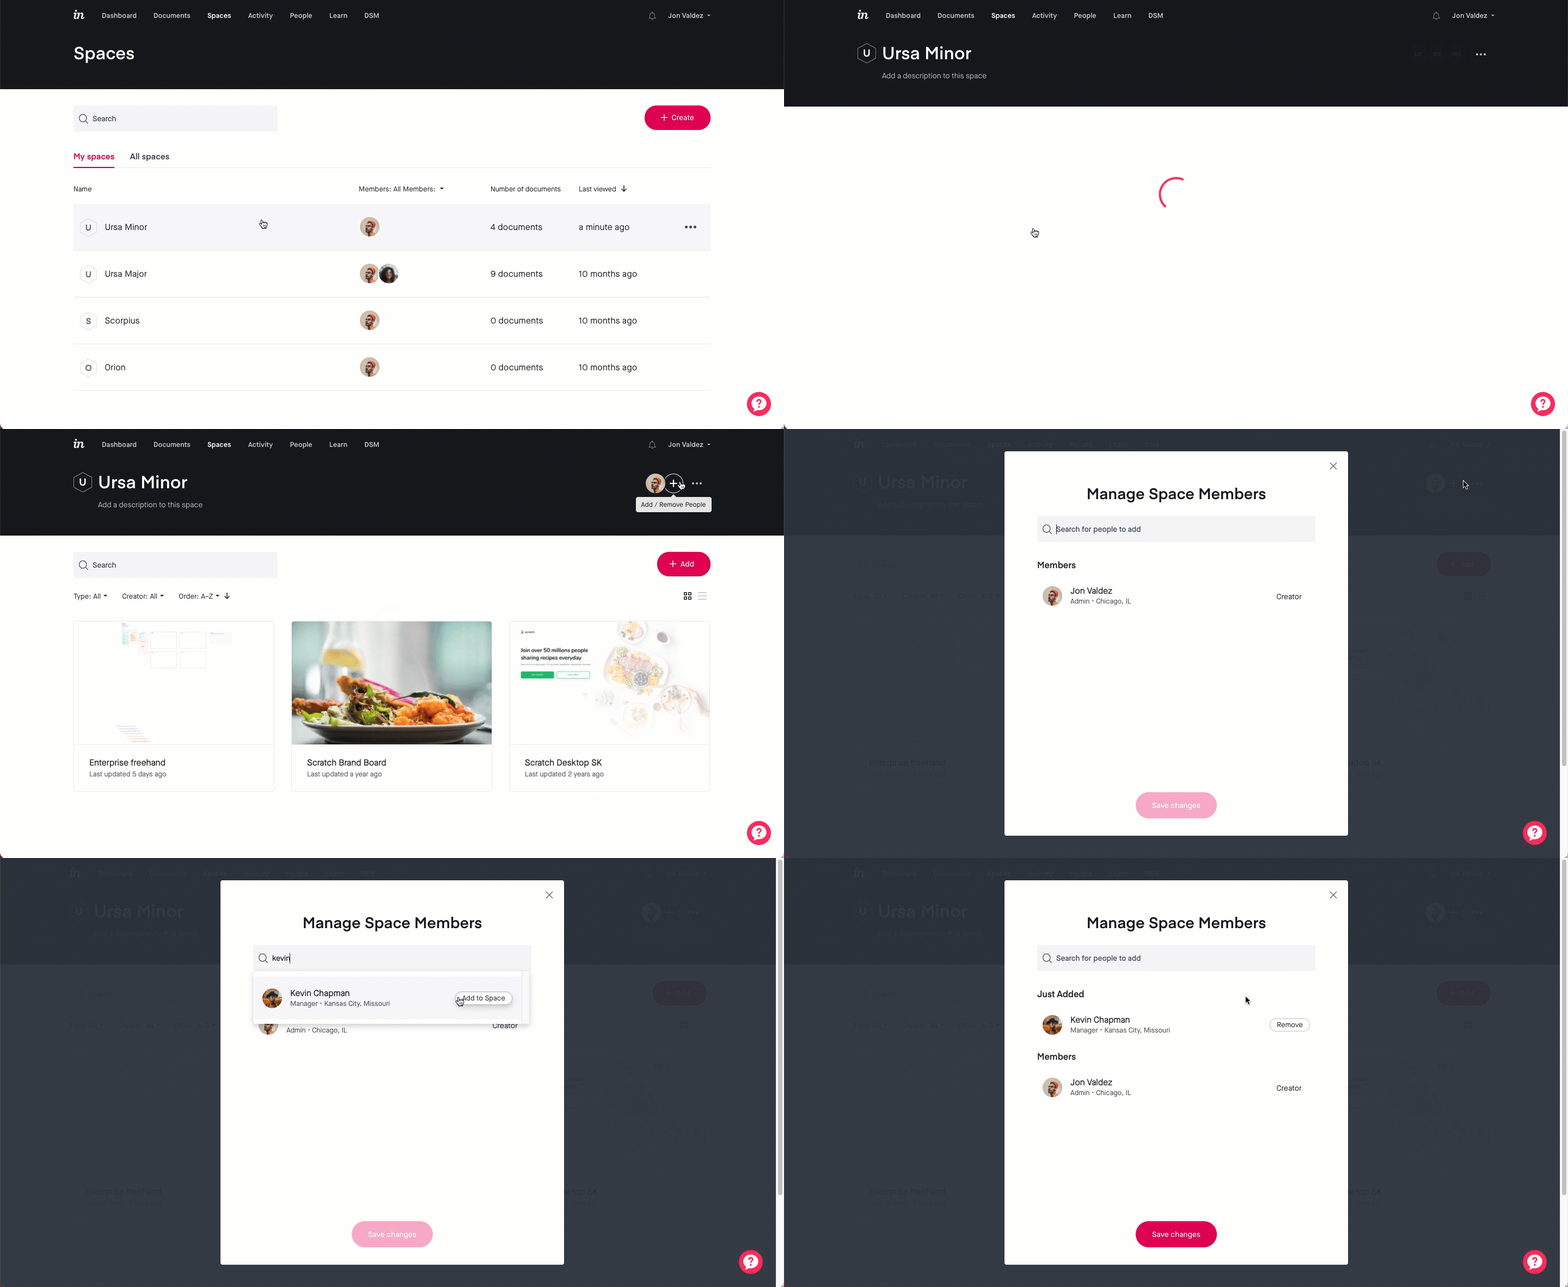
To remove someone from a space:
- Open a space and click the Add / Remove People icon (
.png) ).
). - Next to the user, click Remove.
- Click Save changes.
.gif)
Space permissions
Space permissions vary depending on the user. This table explains which actions each user role can perform.
| Action | Reviewer | Contributor | Manager | Admin | Owner |
| Preview and join all spaces | Sometimes* | Sometimes* | Yes | Yes | Yes |
| Create spaces | No | Yes | Yes | Yes | Yes |
| Edit space name and description | No | Yes | Yes | Yes | Yes |
| Delete spaces | No | Sometimes* | Yes | Yes | Yes |
| Invite users to a space | No | Connections only | Yes | Yes | Yes |
| Remove users from a space | No | Yes | Yes | Yes | Yes |
| Add/remove documents to/from space | No | Yes | Yes | Yes | Yes |
| Leave a space | Yes | Yes | Yes | Yes | Yes |
*Sometimes: only if member permissions allow
Space visibility is controlled by the permission can preview and join all company documents.
Owners, admins, and managers can preview and join any space. Contributors and reviewers can preview and join any space only if they have permission to preview and join all company documents. Otherwise, they can only access spaces they have been invited to.
Leaving a space
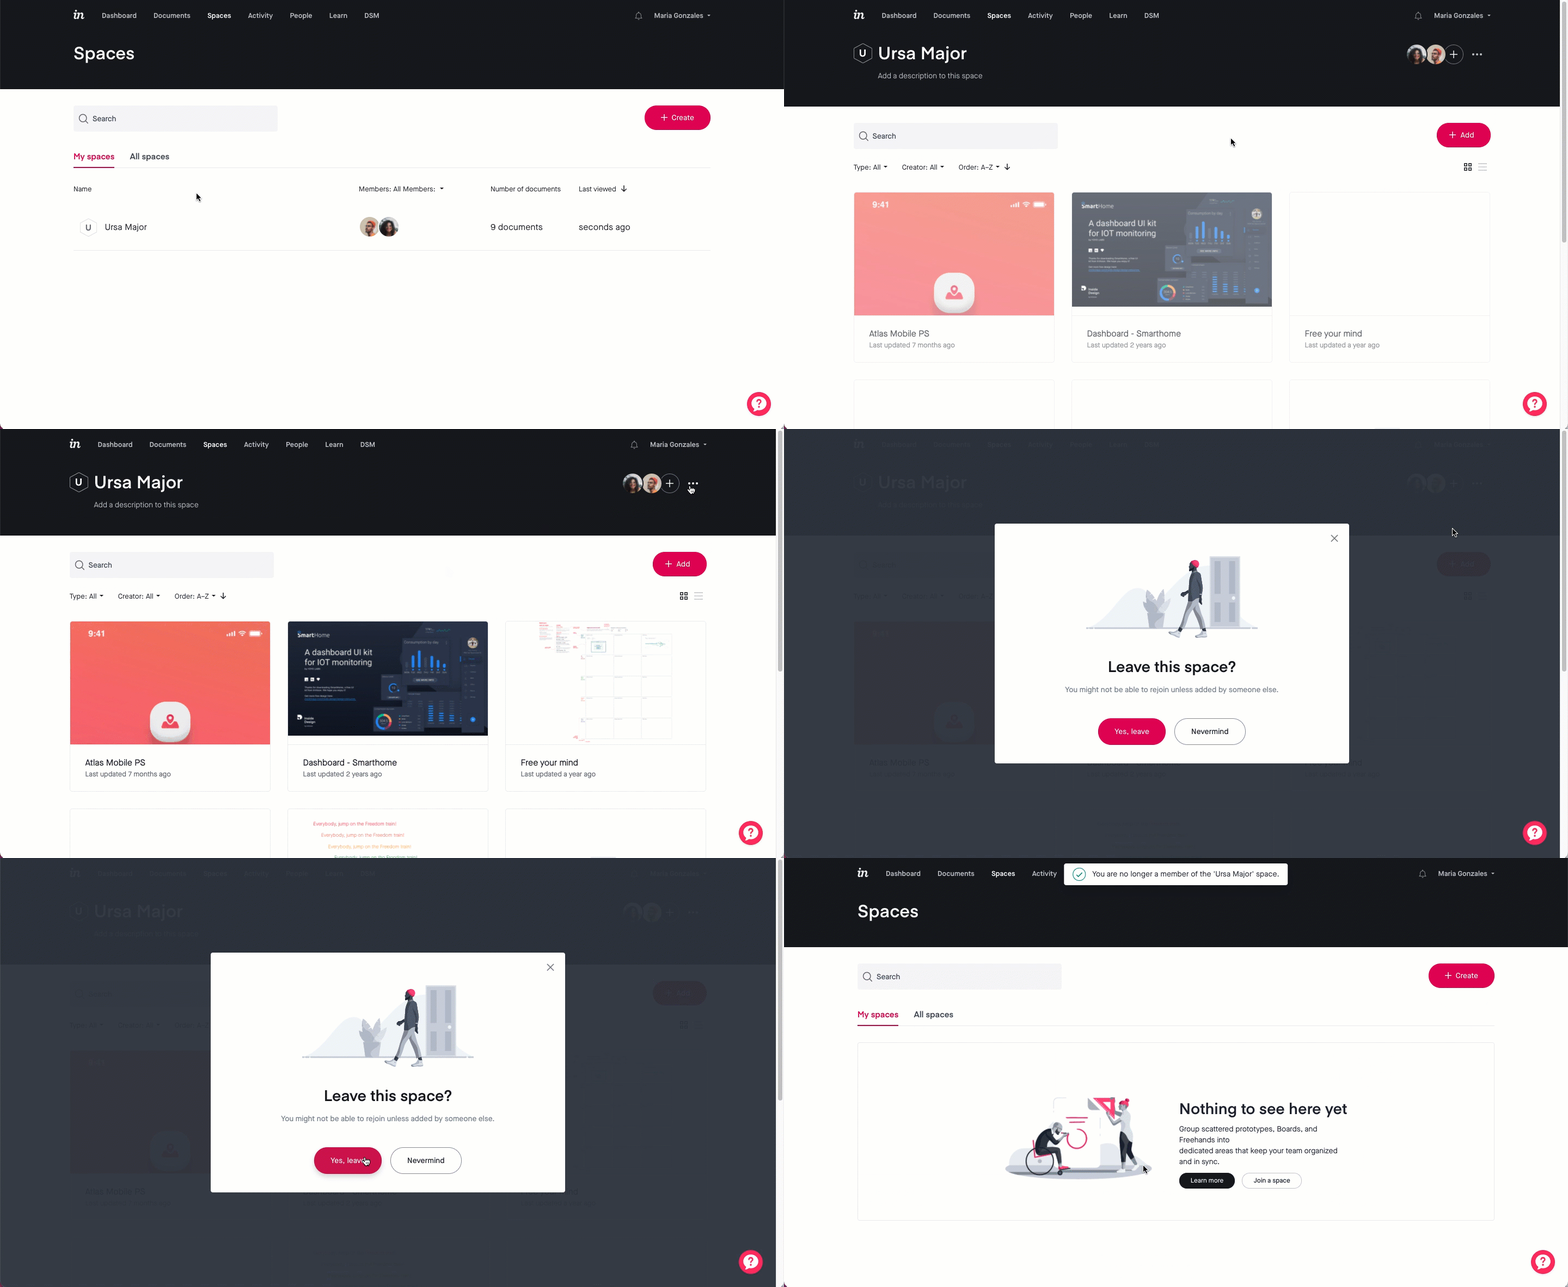
At any time, you can leave an existing space.
To leave a space:
- Navigate to the Spaces page.
- Hover over a space and click the ••• (more) menu.
- Click Leave Space.
- To confirm, click Yes, leave.
What will happen to my V6 spaces in V7?
Using Spaces to organize your projects in V6 will help keep your documents organized for all your team members.
Once your team migrates to the new InVision V7 platform, any starred items can be found in your team-dedicated spaces. As you create or join spaces, you’ll find them in the My Spaces section of the left sidebar, making it easy for everyone to find their work.
To learn more about how to use spaces in InVision V7, check out this article: Spaces in InVision V7.


 ).
).
.png) ).
)..gif)
