- 22 Feb 2023
- 2 Minutes to read
- DarkLight
Organizing InVision V7 prototype screens into sets
- Updated on 22 Feb 2023
- 2 Minutes to read
- DarkLight
This article provides answers for InVision V7
To confirm your version, check the upper right corner of your dashboard. On V6? Check out this article instead.
With InVision V7, you can organize your prototype screens into different sections called sets. This can be especially helpful when working with larger prototypes.
Creating a new set
To create a new set:
- Sign in to InVision V7 and open your prototype.
- In the left panel, click Add set.
- In the text field, type a name for the set and press Enter.The number displayed next to the section name indicates the number of screens that are included in the section.

While creating, moving, or sharing a set of screens, the drag-select feature is a welcomed time saver!
Moving screens to a set
To move screens to either a newly created set or a previously existing set:
- Sign in to InVision V7 and open your prototype.
- Hover over a screen and, at the top left, check the circle. Repeat this step for each screen you want to move. To select multiple screens in order, select the first one, hold Shift, and select the last screen in the series.
If you want to move all screens, select at least one screen, navigate to the bottom, and click Select all. - At the bottom right of the page, click the Move selection drop-down and select the appropriate screens set. Alternatively, you can drag and drop the selected screens into a new section.

Sharing a set of screens
There are two ways to share sets in InVision V7:
Create a document link to a set of screens
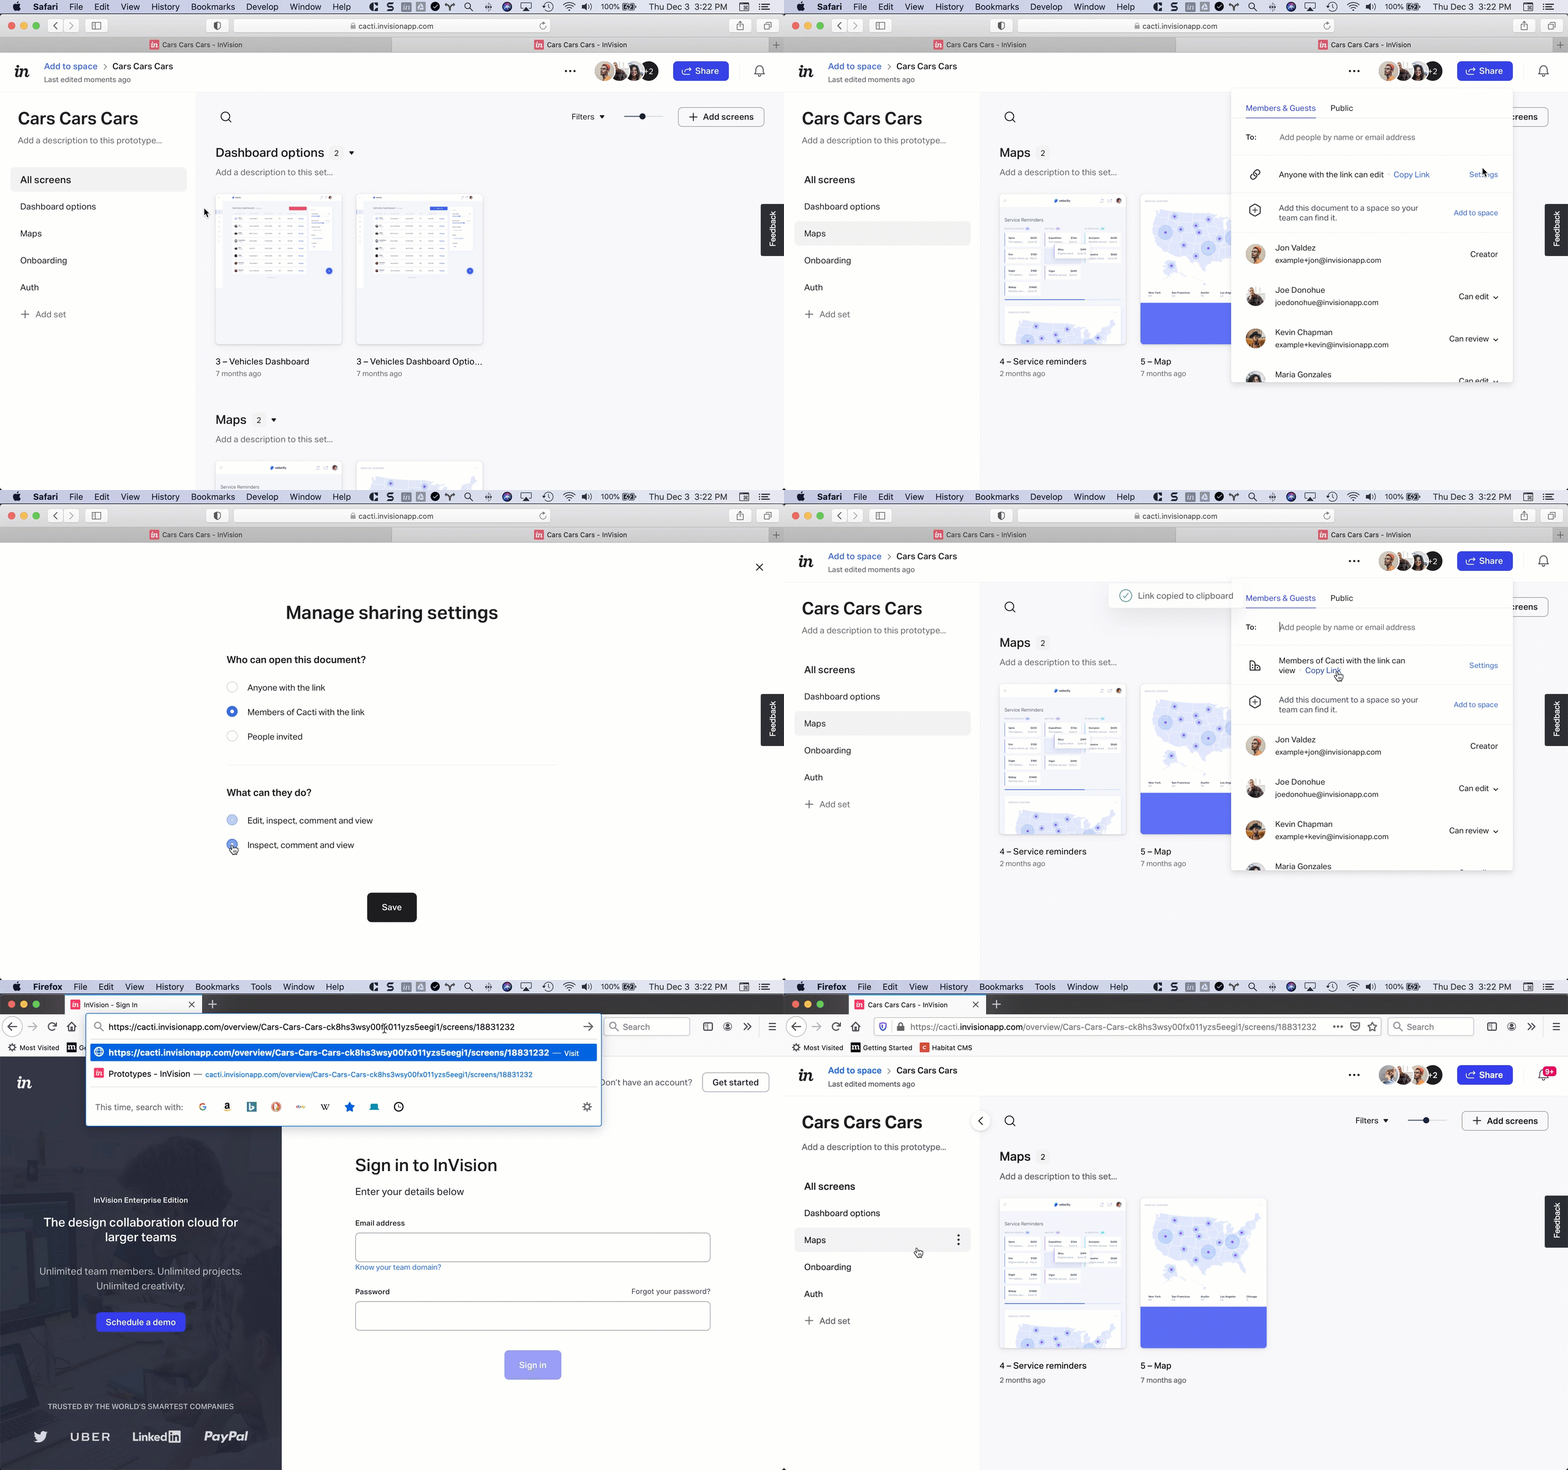
To copy and share a document link to your set:
- In the left panel of the screens overview page, click the set you want to share.
- At the top right, click Share.
- Click the Members & Guests tab.
- To the right of Copy link, click Settings.
- In the Manage sharing settings modal, select options for the Who can open this document? and What can they dosettings.
Unfamiliar with these settings? Learn more about document link settings or about global team sharing settings. - Click Save.
- Back in the share dialog, click Copy Link, and share the URL as wanted.

Create a public share link to a set of screens
Remember, anyone with a public share link URL can view the screens anonymously—without signing in to your team or InVision. If you enable comments in the public share link settings, however, viewers must sign in before commenting.
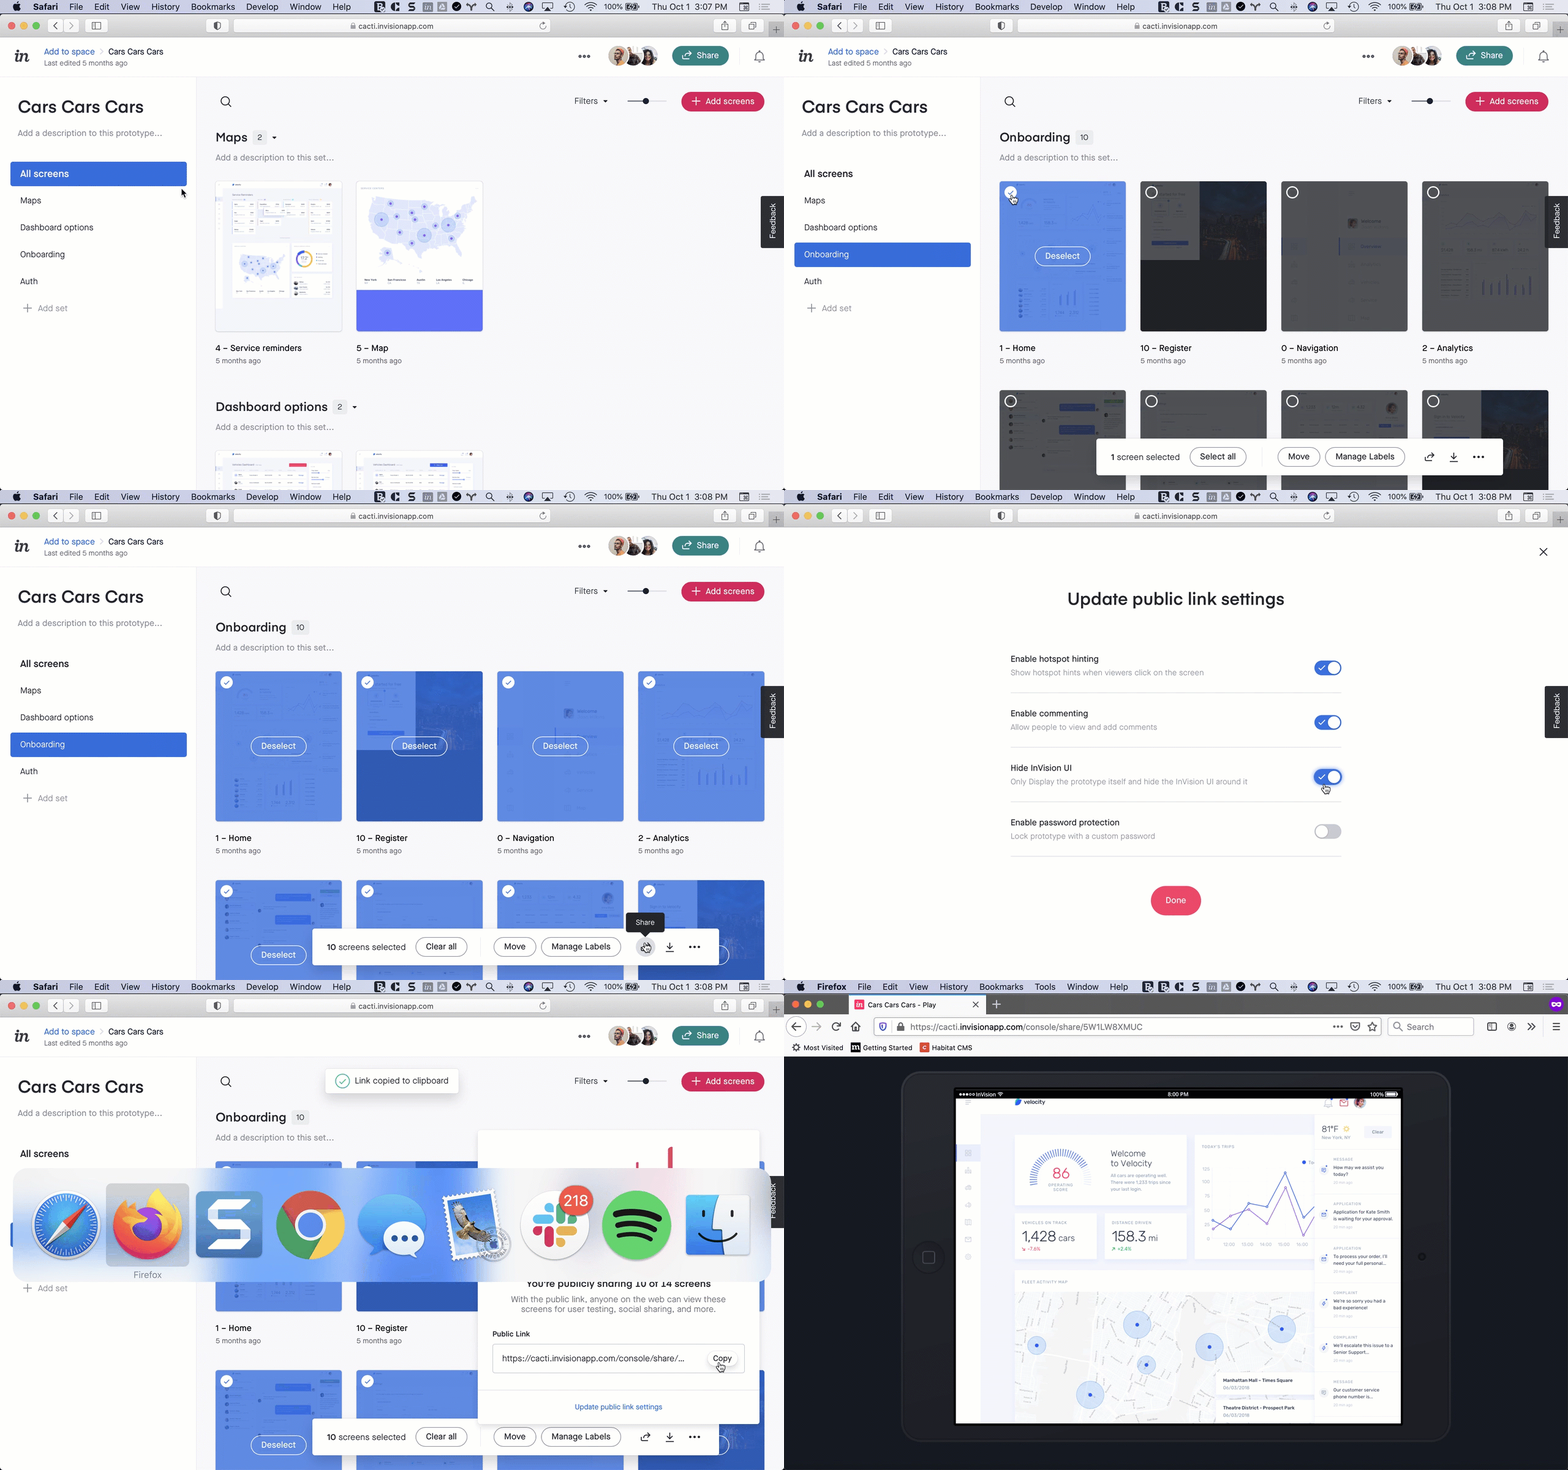
To create a public share link to a specific set of screens:
- In the left panel of the screens overview page, click the set you want to share.
- On the canvas, hover over a screen and click the selection icon in the top-left corner.
- In the toolbar that appeared at the bottom of the canvas, click Select all.
- Click the share icon (
.png) ).
). - Click Update public link settings, configure each setting, and click Done.If you want your public link viewers to see the name of the screen set, toggle off the Hide InVision UI setting. If the InVision toolbar is hidden, viewers will not see the name of the set.
- Click Copy.
- Share the URL for the set as wanted.

Deleting a set of screens
To delete a set of screens:
- Sign in to InVision V7 and open your prototype.
- In the left panel of the screens overview page, locate the set you want to delete.
- To the right of the set title, click the More icon () and select Delete.
Any screens that were stored in the deleted set will still be available in the All Screens section of your prototype.


.png) ).
).