Groups overview
- 02 May 2023
- 2 Minutes to read
- DarkLight
Groups overview
- Updated on 02 May 2023
- 2 Minutes to read
- DarkLight
Article Summary
Share feedback
Thanks for sharing your feedback!
This article provides answers for InVision V7 To confirm your version, check the upper right corner of your dashboard. On V6? Read this article instead. | 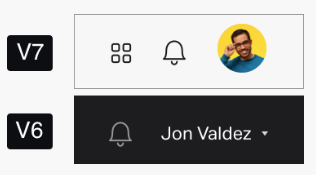 |
Groups are document folders that help you group and share documents across your team. You can add a prototype, spec, freehand, or board to a group, and even create a space within a group.
More than storing your documents, groups provide a place for groups of people rallying around projects. Groups let you create standards, structure, and order to encourage effective project management and collaboration. Groups also serve as windows into the status and progress of projects for your teammates.
You can access all groups and spaces you've created or joined from the left sidebar.
As you get started with groups, note these important details:
- Each group for your team must have a unique name. For example, there can be only one group named Highlander on your team.
- A document can live in only one group at a time. You can, however, move a document from one group to another if you have access to edit the document.
- You don't need to add documents to a group at all, but your teammates may thank you for helping them stay focused by creating and using groups.
- If you have access to a group, you can (at the very least) open every document within that group, regardless of the given document’s permissions.
Types of groups
You can set up two types of groups in InVision V7:
- Team group: Your team members—excluding guests—can discover and access all the documents within your team group. Use a team group to better socialize design across your organization.
- Invite-only group: Your teammates can't discover and access the documents within an invite-only group unless they have been invited to join. An invite-only group helps you secure whatever needs securing. Note that invite-only groups require a paid account.
Team owners and admins can access and manage all groups in the account if the team sharing setting Allow admins to manage all documents and spaces is selected. For more information about team sharing settings, read: Configuring InVision V7 team sharing settings.
Examples of groups
With groups, you can arrange documents by any number of categories. A few customer examples include using groups to categorize by:
- Client
- Feature
- Release
- Department
- Platform
Add groups to your sidebar
Add frequently used groups to your sidebar for quick access. From within a group, select Add to sidebar to add the group.
To remove a group from the sidebar, you can:
- Enter the group and select Remove from sidebar
- In the sidebar, beside the group name, select
 More > Remove from sidebar
Add documents to groups
To create a new document in an existing group or to move existing documents to your group, read this article: Move or add InVision V7 documents to a group
Invite people to a group
To invite team members to your group, read this article: Add people to a group in InVision V7
Create spaces inside groups
Spaces add a layer of organization within groups. Learn more here: Spaces in InVision V7
Was this article helpful?