Adding screens in InVision V7
- 02 Feb 2023
- 5 Minutes to read
- DarkLight
Adding screens in InVision V7
- Updated on 02 Feb 2023
- 5 Minutes to read
- DarkLight
Article Summary
Share feedback
Thanks for sharing your feedback!
This article provides answers for InVision V7 To confirm your version, check the upper right corner of your dashboard. On V6? Check out this article instead. | 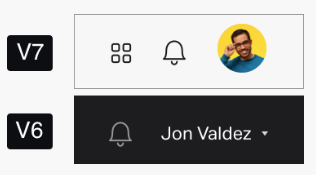 |
Accepted file formats and size limits
The formats we support vary depending on whether you're uploading a screen or a source file.
For screens, we currently only support source image files in the following formats:
- GIF
- PNG
- JPEG
We recommend uploading Sketch files via Craft Sync.
When uploading an image to your screens, there is a 10 MB file size upload limit. Individual files can be up to 500 MB, and accounts can hold up to 10 GB when uploading or dragging/dropping files into InVision via your browser.
The 10 GB limit does not apply to Enterprise plans.
Syncing screens from Sketch
You can sync screens from Sketch using Craft Sync. Learn more here:
Manual screen uploads
To upload your screens manually:
- Open your prototype's screens overview.
- On the right side, click the + Add screens button.
- Click Upload Screens.
- Select the files you'd like to add as screens and click Open.
To upload one or more new screens while viewing a prototype in the InVision Console:
- Open the prototype, hover over a screen, and click View screen.
- Hover over the screen name at the bottom-left end of the Console, and then click Expand thumbnail tray.
- Use either method to select and upload the new screen/s to the thumbnail tray:
- From your Finder window, drag and drop the new screen/s directly onto the Drop an image here or browse to upload box.
- Click browse within the same box, select the images, and click Open.
Alternatively, you can drag and drop any .png, .jpg, or .gif file over an open space in the screens tab. Dropping on an existing screen can result in replacing a screen, if the screen names are the same.
Replacing screens
Warning: Once you've updated screens and you're ready to replace old versions, please note that if you want to auto-replace screens using the instructions below, each screen must have the same file name as the screen you are replacing, otherwise they'll upload as entirely new screens. If named identically, any screen you replace should retain all hotspots, templates, and comments associated with the previous version.
To replace one or more screens via Craft Sync, you need to update the artboard you originally synced in Sketch and sync it again via Craft Sync. See this article for more details: Replacing screens in an InVision V7 prototype.
For more information on using Craft Sync, check out this article in our Knowledge Base: How do I publish prototypes from Sketch?
To manually replace a single screen in InVision V7:
- In InVision, open your prototype.
- On the main screens page, locate the screen you want to replace.
- Drag and drop the updated screen image into the browser—directly over the screen it should replace.
To replace multiple screens in InVision V7:
- Open the prototype.
- On the screens overview page, click the Add Screens button and then click Upload screens. The Finder window opens.
- Select the new image files that should replace the old screens.
- Click Open.
To replace screens previously uploaded as PDFs, you'll need to upload via source files. This will initially sync all screens of the PDF and subsequently will sync only the pages in the PDF that have been updated. Comments and hotspots should all remain in place.
To learn more about replacing screens, see this article: Replacing screens in an InVision V7 prototype.
Screen sizes for desktop and web
When designing for desktop and web browsers, you can either size your screens for a specific target resolution or take advantage of features like auto-stretch backgrounds, scaling of screens down to browser width, and the screen alignment options to make your screen suitable for various resolutions.
If designing for a target resolution, there are two resources that can be helpful:
- This site includes common desktop devices and their resolutions.
- W3Counter breaks down screen resolutions by popularity each month.
Retina images
InVision will display any image at 50% by using the prescribed high-resolution modifier, @2x. For example: file_name@2x.png
Use only when necessary as full-page retina images may double your prototype's loading time.
Learn more about using @3x here.
Screen sizes for mobile and tablet
This website for screen sizes includes popular mobile and tablet screen resolutions.
Take care to adjust your screen dimensions to account for the status bar if necessary. See Including the status bar in iOS below for more details.
For the iPhone in particular, you can use this resource from PaintCode. Remember, mobile prototypes can scroll, so the screen heights listed below are simply minimum heights for your designs. When deciding what size screen to use, you should note that particularly large screens may appear blurry when viewed in Safari on iOS. For more information, read this article in our Knowledge Base: Why are my images in iOS blurry?
Including the status bar in iOS
InVision will overlay a status bar on your designs by default, so including a status bar in your design isn't necessary unless you prefer to include it. If you find that the status bar InVision provides is cutting off the top of your mobile screens, click the My design starts below the status bar checkbox in your prototype settings—accessed via the ••• (More) menu at the bottom-right of the window when viewing the prototype.
If you have selected the My design starts below the status bar checkbox), you’ll need to leave appropriate blank space at the top of your design, as specified here for each model:
- iPhone X: 44px height
- iPhone 6 Plus: 60px height
- iPhone 4 – 6: 40px height
- iPhone non retina: 20px height
- Retina iPads: 40px height
- Non-retina iPads: 20px height
Additionally, note that you’ll need to use an external tool (e.g., Sketch, Omnigraffle, Adobe Photoshop, Pencil Project, or Microsoft Paint) to edit your images' sizes before uploading your image files in InVision.
Including the status bar and nav bar in Android
On Android prototypes, you can exclude the status bar in your design and check the box for My design starts below the status bar to let InVision take care of the status bar. Alternatively, you can account for the height of the status bar in your design.
For some Android devices, you might also need to account for the height of the nav bar in your design.
For more on the heights of these system UI elements, see Google's design spec for Android and Chrome OS.
Was this article helpful?