Share InVision V7 prototypes
- 28 Mar 2023
- 5 Minutes to read
- DarkLight
Share InVision V7 prototypes
- Updated on 28 Mar 2023
- 5 Minutes to read
- DarkLight
Article Summary
Share feedback
Thanks for sharing your feedback!
This article provides answers for InVision V7 To confirm your version, check the upper right corner of your dashboard. On V6? Check out this article instead. | 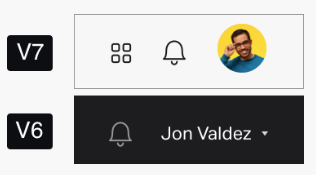 |
Invite people to a prototype
- Open the prototype and, at the top right, select Share.
- In the Add people field, enter the name of the person or user group you want to invite and select it from the list that appears.
Note: If you want to add someone who isn't yet a member of your team, enter their email address. - To the right of the Add people field, open the drop-down and select Can edit or Can review.
- Select Invite.
Note: If you updated from V6 Enterprise, your existing teams were converted to user groups. Learn how teams and user groups differ.
Use document links
Document links are the main working URLs for prototypes, freehands, specs, and boards.
To get a document link:
- Open a prototype and, at the top right, select Share.
- Select who can open the document in the drop-down menu on the left:
- Anyone with the link
- Members of [your team]
- Only people invited
- Select what they can do in the drop-down menu on the right:
- Can edit
- Can comment
- Select Copy Link.
You can now send that link to anyone you want to join your prototype.
To learn more about document link settings, check out this article: InVision V7: What settings are available for document links?
To learn more about the global team sharing settings that determine which roles can manage access via document links, read this article: Configuring InVision V7 team sharing settings
Share specific prototype screens
Designers and managers often need to orient collaborators by sharing a curated view of screens. InVision V7 gives you two ways to organize screens into groups, which you can then share as a document link:
- Create and share a set of screens
- Filter with screen labels, comment type, or keyword and share the filtered view
Tip: You can also create public share links for sets of screens and/or filtered views. For instructions, see Creating a public share link to specific screens below.
Share a document link to a set of screens
Organizing InVision V7 prototype screens into sets is especially useful when working with larger prototypes or when needing feedback on a particular user flow.
After creating a new set and moving screens to it, it's time to copy and share the document share link, which takes recipients directly to your set of screens.
To copy and share a document link to your set:
- In the left panel of the screens overview page, select the set you want to share.
- At the top-right corner of the page, select Share.
- Select who can open the link to the set in the drop-down menu on the left:
- Anyone with the link
- Members of [your team]
- Only people invited
- Select what they can do in the drop-down menu on the right:
- Can edit
- Can comment
- Select Copy Link.
Share a document link for a group of filtered screens
The ability to create custom filtered views with InVision V7 prototype screen labels lets you share document links to each curated view. Editors of an individual prototype can manage the labels available for that prototype as well as create new labels, like Jira milestones, and edit the names and colors of the labels in our starter set: In Progress, Needs Review, or Approved.
After creating and/or adding labels to your screens, you're ready to copy and share the document link URL, which takes recipients directly to your filtered view.
To filter your screens and share a document link URL:
- Next to the name of the prototype on the screens overview page, select the Filters dropdown.
- Select the appropriate label.Note: To apply multiple filters, select each label.
- At the top right, select Share.
- Select who can open the link to the filtered view in the drop-down menu on the left:
- Anyone with the link
- Members of [your team]
- Only people invited
- Select what they can do in the drop-down menu on the right:
- Can edit
- Can comment
- Select Copy Link.
Use public share links
Public share links make it easy to share your prototypes with a broader audience that's not part of your team. If you are on an Enterprise plan, you can also password protect public links.
Note: Only users with edit permissions in a prototype can create public share links for that document.
Create a public share link
- Open the document and, at the top right, select Share.
- In the share dialog, select Public, and then select Generate link.
Note: If there is an existing public link for the document, you won't see the Generate link screen. - Select Update public link settings, make any changes to your settings, and then select Done.
- Back in the share dialog, copy the public link URL (
 ) . You can now share that public link with anyone you choose.
 ) . You can now share that public link with anyone you choose.
To learn more about public link settings, read the article: Configuring public share link settings for InVision V7 prototypes.
Create a public share link to specific screens
To share a curated view of specific screens, you can create a public share link for screen sets, screens filtered by labels, screens filtered by comments, screens filtered by search term, or all of the above:
- Filter your screens:
- In the left panel of the screens overview page, select any screen sets you want to include.
- Just below the collaborator avatars on the screens overview page, select the Filters drop-down, and select comment filters and the appropriate screen label/s.
- At the top left of the canvas, select the search icon (
 ) and enter key terms (if applicable).
- On the canvas, hover over a screen and click the selection icon in the top-left corner.
- Select Share (
.png) ).
). - Select Update public link settings, configure each setting, and select Done.Note: If you want your public link viewers to see the name of any screen sets you've included, toggle off the Hide InVision UI setting. If the InVision toolbar is hidden, viewers will not see the name of the set.
- Copy () and share the URL.
.png) ).
).Delete a public share link
At some point, you may want to revoke public access to a public link.
To delete a public share link for a prototype:
- Open a prototype and, at the top right, click Share.
- Click the Public tab, and then click Update public link settings.
- Click Delete link. The public link is immediately deleted and no longer accessible.
Note: To learn more about revoking all public share links for a prototype, check out this article: InVision V7: How do I revoke all public share links?
Remove a user from a prototype
Read Remove a user from a document in InVision V7 for more details on how to remove users from your prototypes.
Was this article helpful?