How do I share screens from InVision to Slack?
- 29 Aug 2023
- 2 Minutes to read
- DarkLight
How do I share screens from InVision to Slack?
- Updated on 29 Aug 2023
- 2 Minutes to read
- DarkLight
Article Summary
Share feedback
Thanks for sharing your feedback!
This article provides answers for InVision V6 To confirm your version, check the upper right corner of your dashboard. On V7? Check out this article instead. | 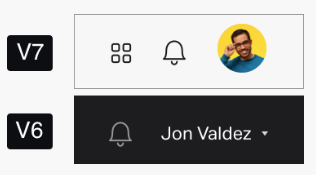 |
With InVision for Slack, you can quickly share screens from InVision to your team in Slack.
Before you start
Before you begin sharing screens to Slack, here are a few things to note:
- You must be a Slack administrator to add the plugin from Slack's App Directory.
- If you installed the plugin from Slack's App Directory, you still need to follow the individual setup instructions for authorizing InVision to share screens.
- For more information and frequently asked questions about InVision for Slack, check out this article: How do I integrate Slack with InVision?
Authorizing InVision with Slack
If you haven’t used this feature before, you’ll need to first authorize InVision to post to Slack.
Note: You must authorize each prototype you want to share screens from. However, if you've already authorized InVision to send activity updates for that specific prototype, you don't have to complete these setup instructions.
To authorize InVision:
- Sign in to your InVision account and navigate to the Documents page.
- Click to open your prototype and navigate to the desired screen.
- At the bottom of the page, click the social share icon (
 ), and then click Slack.
 - Click Authorize.
- If not already signed in, enter your workspace’s Slack URL and click Continue. Then enter your Slack credentials and click Sign in.
- In the Post to drop-down, select a channel. You can add more channels later.
- Click Authorize.

Sharing a screen to Slack
After authorizing InVision, you can begin sharing screens to Slack.
To share a prototype screen:
- Sign in to your InVision account and navigate to the Documents page.
- Click to open your prototype and navigate to the desired screen.
- At the bottom of the page, click the social share icon (), and then click Slack.
- Click the first drop-down and select an existing channel or click Add a new channel.
Note: For instructions on adding a new channel, read the section "Authorizing additional channels." - If desired, add a comment that will post in Slack with the screen.
- If you want viewers in Slack to see all prototype screens, check the box Allow access to all screens in prototype.
- Click Send.

In Slack, users will see a preview of the screen you shared. To see the screen in InVision, click the linked prototype name.

Authorizing additional channels
At any time, you can authorize InVision to post to new channels. To add new channels:
- Sign in to your InVision account and navigate to the Documents page.
- Click to open your prototype and navigate to one of your screens.
- At the bottom of the page, click the social share icon (), and then click Slack.
- Click the first drop-down and select Add a new channel.
- On the page that opens, click the Post to drop-down and select the desired channel.
- Click Authorize.
When you share screens to Slack, you will see the newly authorized channel.

Note: Currently, you cannot deauthorize a single channel. You will need to remove the InVision app from Slack and reauthorize the channels you want to include.
Was this article helpful?