- 08 May 2023
- 3 Minutes to read
- DarkLight
Freehand app for Webex
- Updated on 08 May 2023
- 3 Minutes to read
- DarkLight
The Freehand app for Webex allows you to easily share freehands and collaborate with stakeholders during your Webex meetings. You can share an existing freehand, create a new one, and present them, all without leaving the Webex window.
Creating and presenting freehands during a Webex meeting
Before you start:
- If you don’t see the Freehand app available in the Webex App Hub, make sure your Webex administrator has enabled the app for your organization.
- All participants have the ability to share a freehand during a meeting.
- In order to edit the freehand, call participants need to be added as members or guests in your InVision team and have editing access to the Freehand document.
Learn more about how to add members to your InVision team here: Adding users to an InVision V7 team. - Only one freehand can be presented at a time during a meeting. If one of the call participants wants to present a different freehand, the current presenter or the host of the meeting will need to stop presenting first.
- If any call attendees join the meeting after a freehand is already being presented, they will see the Freehand app open and will be prompted to sign in to InVision to view the freehand.
To create a new freehand and share with meeting attendees:
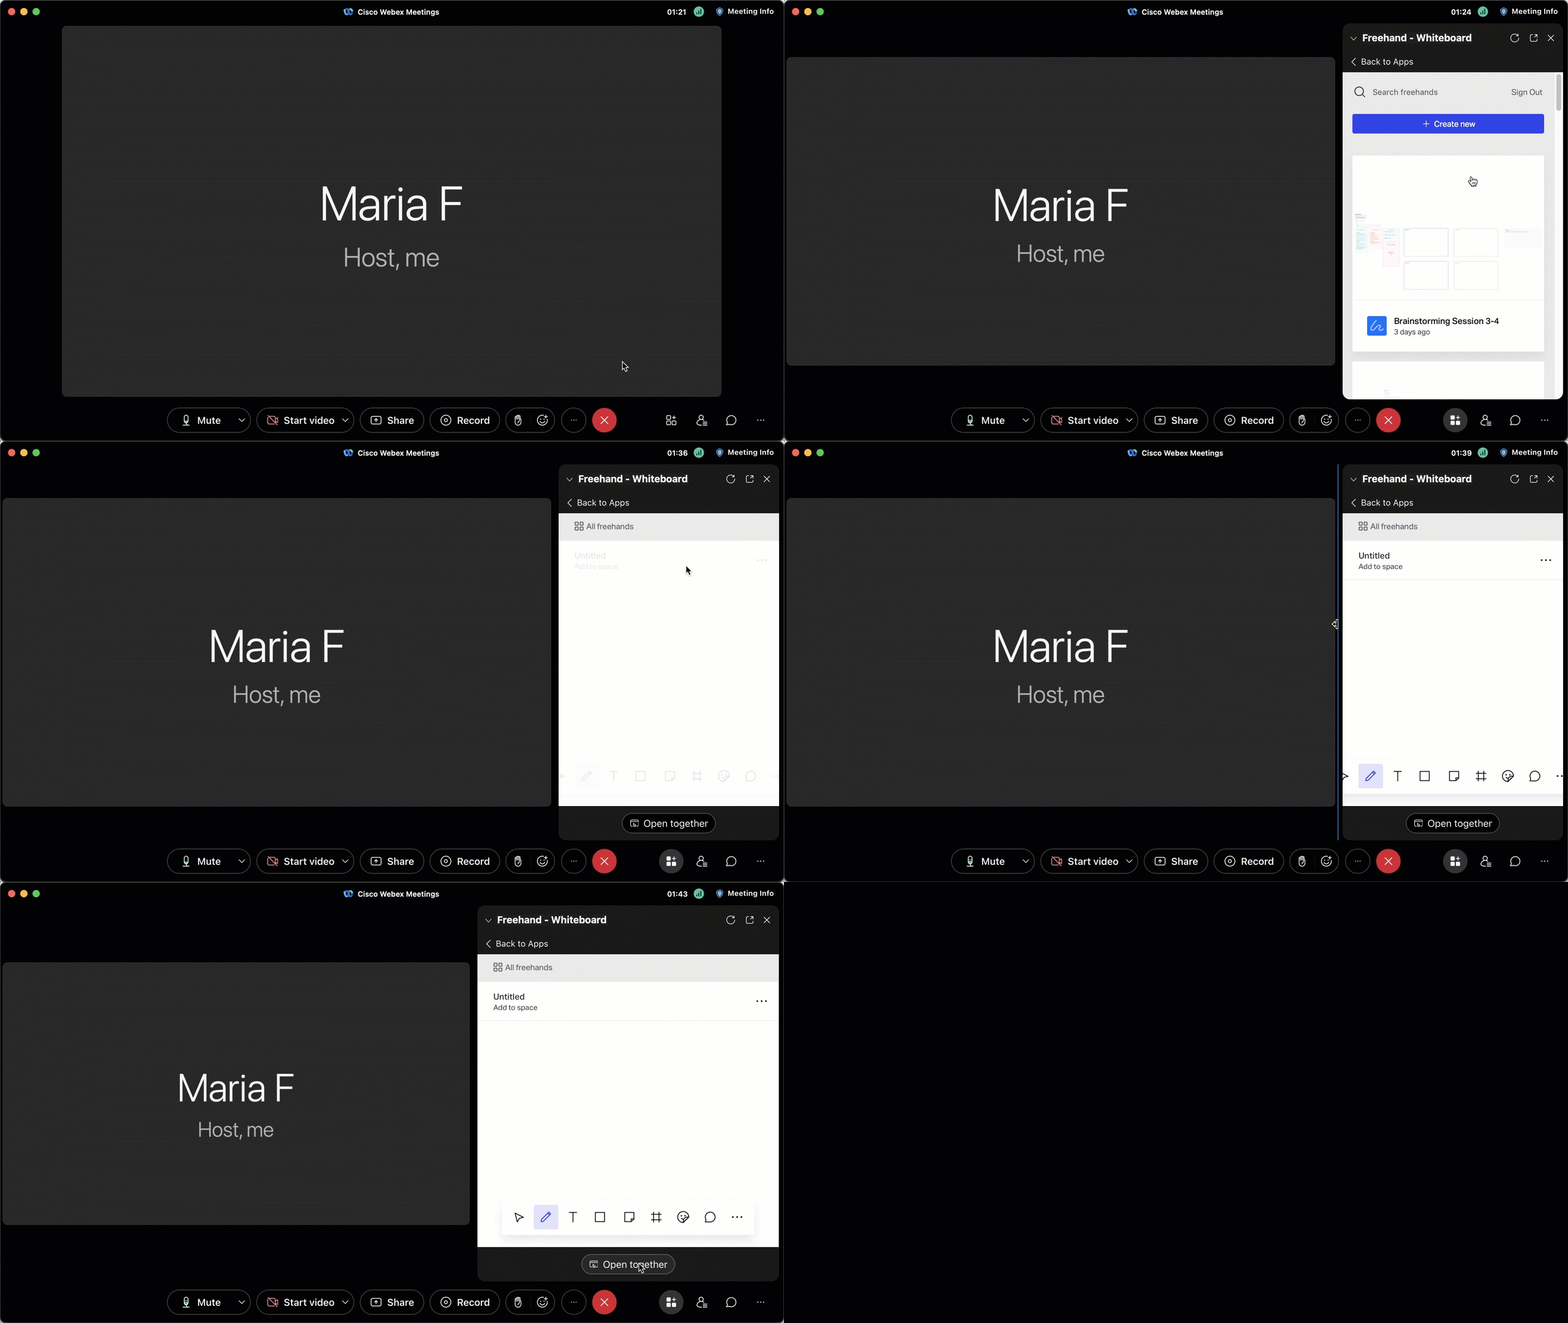
- Open your Webex meeting and select the Apps icon at the bottom-right of your meeting window.
- In the Apps panel, scroll to locate InVision Freehand - Whiteboard and select on it.
- Select the Sign in button to sign in to your InVision account.
- Enter your InVision credentials and follow the prompts to authorize the app and access your freehands.
- Select + Create new.
- A new freehand will open. Select Open together to start presenting and sharing the freehand with the other attendees.
- The freehand will open in the Webex meeting.
- You can now edit the freehand directly in Webex and present it.

To select an existing freehand and share with meeting attendees:
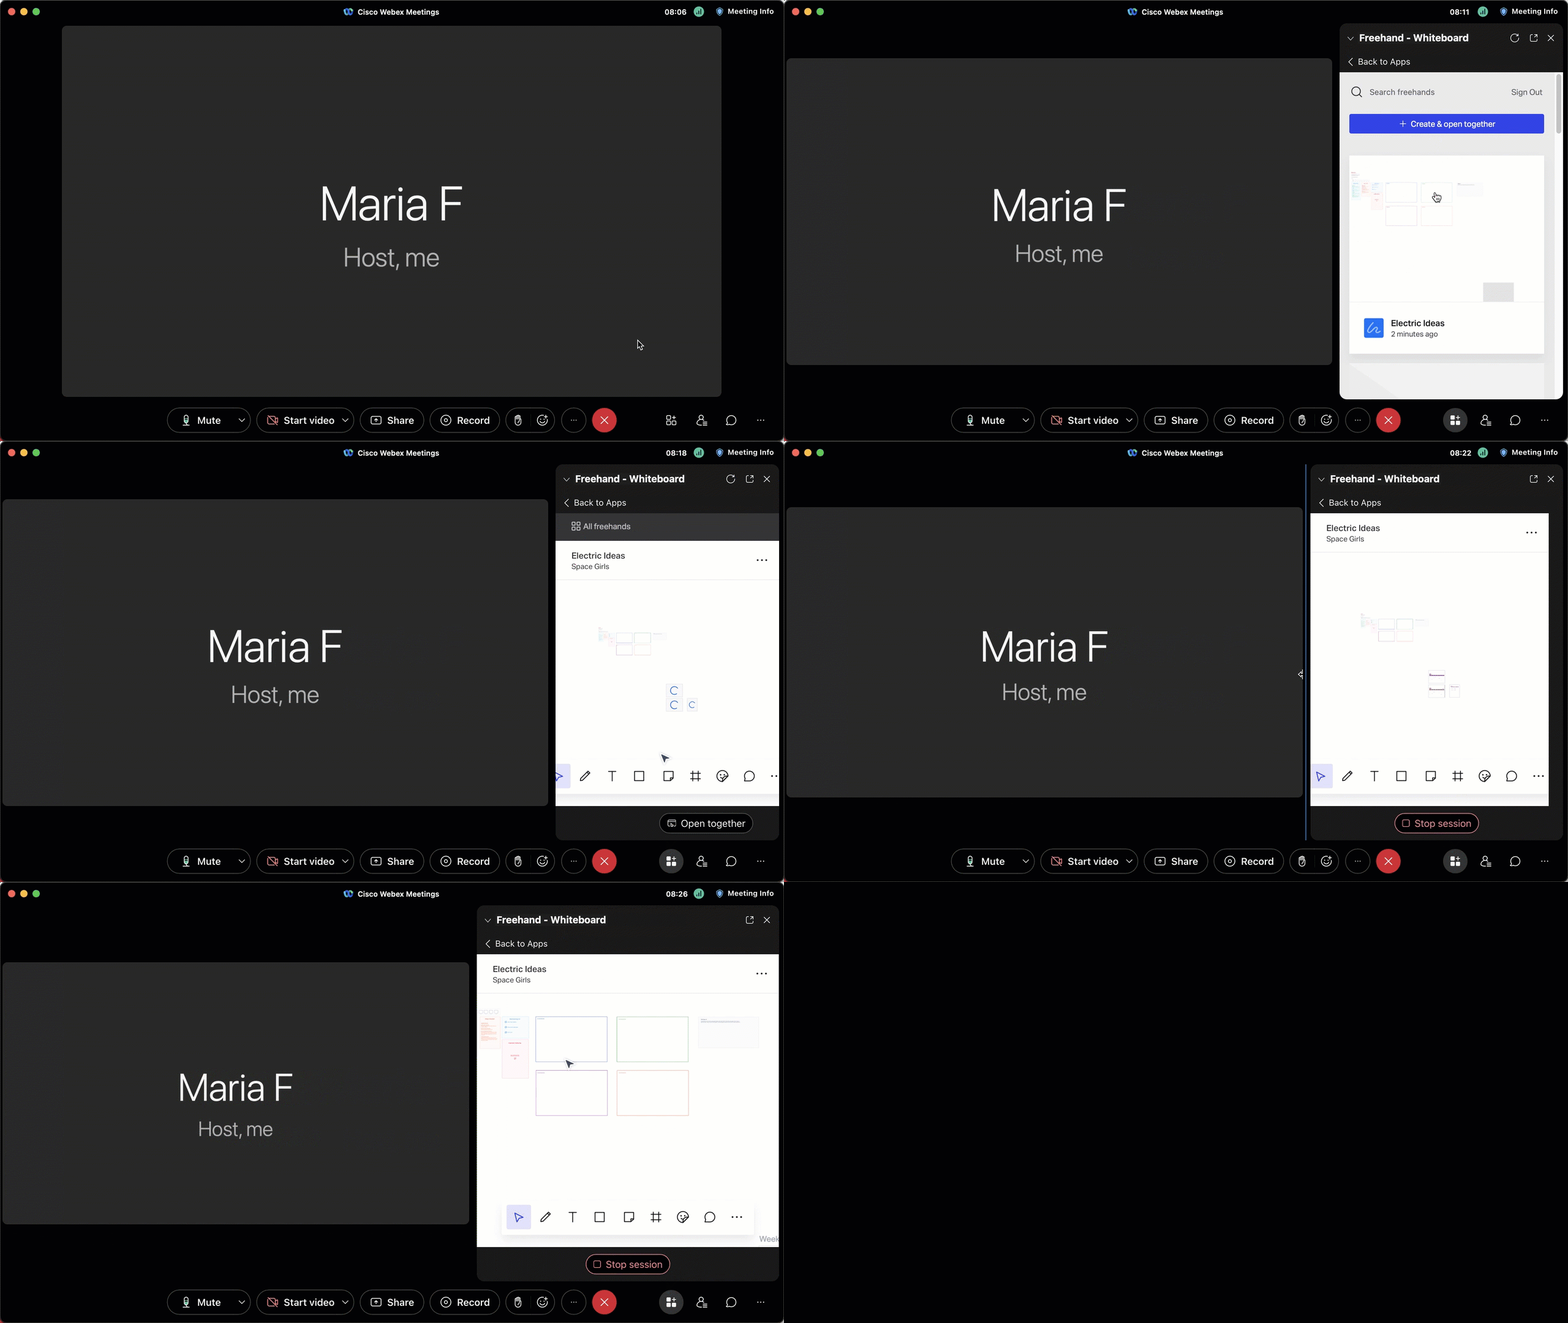
- Open your Webex meeting and select the Apps icon in the toolbar of your meeting.
- In the Apps panel, scroll down to locate InVision Freehand - Whiteboard and select on it.
- Select the Sign in button to sign in to your InVision account.
- Enter your InVision credentials and follow the prompts to authorize the app and access your freehands.
- A preview of the Freehand will open. Select Open together to start presenting and sharing the freehand with the other attendees.
- The freehand will open in the Webex meeting.
- You can now edit the freehand directly in Webex and present it.

Stop presenting a freehand during a meeting
To stop presenting a freehand with meeting attendees, select Stop session at the bottom of the Freehand window —When asked Stop app session?, select Yes. After that, all participants in the call will stop seeing the freehand.

Switching to a different Freehand during a meeting
During a Webex meeting, participants can switch to a different freehand and present it to the other call attendees.
To switch to a different Freehand during a Webex meeting:
- Select Stop session to stop presenting the current freehand.
- Select All freehands at the top left corner of the Freehand app.
- The Freehand app dashboard will open.
- Select Create new or select an existing freehand.
- Select Open together to start presenting the freehand.

Including the Freehand app in the recording of a Webex meeting
Webex allows you to record your meetings to share them with people who can’t join or to review what was discussed at a later time. If you want to include your Freehand canvas in the recording of a meeting to provide additional information and context, you need to use the below workaround.
- Once you have opened a new or existing Freehand in your Webex meeting, select Share at the bottom of your Webex window.
- In the Share Content modal, select Webex and select Share.
- At the top of your computer screen, you’ll see a toolbar with different options. Select Share.
- In the dropdown that opens, select Share My meeting Window.
- At the bottom of your Webex meeting window, select Record.
- In the panel that appears, select Record to start recording.
- To stop recording your Webex meeting, select Record at the bottom of the meeting window and then select Pause or Stop in the panel that opens.
- In the toolbar at the top of your computer screen, select Stop Sharing.


